Featured

Crochet Poinsettia

I made this gorgeous brooch a couple of years ago, but I never took notes for the pattern. Then I lost the brooch, then found it and then I received a message asking for the pattern, I’m so sorry I don’t remember who the message was from.

I have promised I’ll figure out how I made it and post the pattern. Unfortunately, I got very busy with writing a new book and teaching, and the poinsettia completely slipped my mind.

I just managed to get to it now, I’m so sorry for the delay. This is a very basic pattern of what I can see without undoing the brooch.

Yarn: for the flower petals I have used 4ply and kidsilk haze held together in red. For the leaves I have used DK or worsted in green.
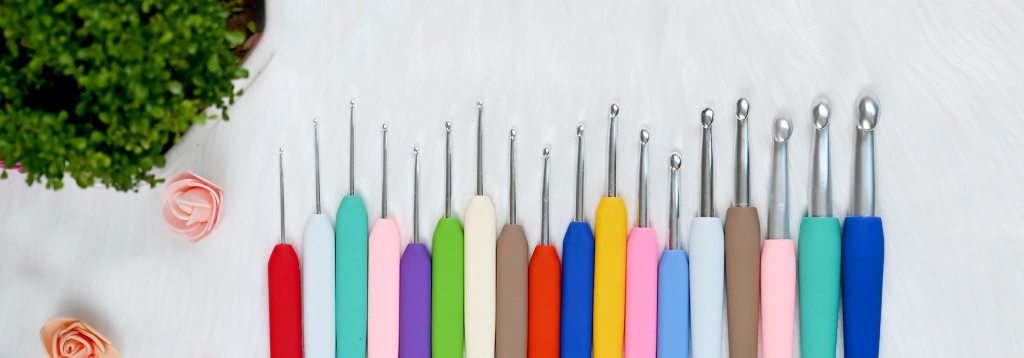
3.5mm crochet hook

The beads in the centre are sewn on after the flower is made, you don’t have to use beads, make the centre in a different colour or use a button.

The poinsettia is made in three parts:

Part 1 – upper part – small petals in red all worked in one.

Part 2 – middle part – medium petals in red worked separately, make 6.

Part 3 – lower part – large petals in green worked separately, make 6.

Pattern notes:

  • The pattern is written using UK terminology, US conversion in the abbreviation list.
  • When instruction say for example: 2dc it means to work 1 dc in next 2 sts. When it says: 2tr in next st, it means to work 2tr in one st.

Abbreviations

[] – rep as many times as directed within the square brackets, ch – chain, ch-sp – chin space, dc (US sc) – double crochet (US single crochet), htr (US hdc) – half treble (US half double crochet), tr (US dc) – treble (US doubler crochet), sl st – slip stitch, st(s) – stitch(es), rnd – round, picot – ch3, sl st to first ch.

Part 1

Foundation rnd 1: work ch1, 6dc, into an adjustable ring, enclosing the yarn end as you work, pull tight on the yarn end to close up opening, sl st to first dc.

Foundation rnd 2: ch1, 2dc in every st, sl st to first dc. (12 sts)

You will now create petals by working chains and dc and joining by sl st to stitches of foundation rnd 2.

Rnd 1: [ch6, 1dc in second ch from hook, 1dc in each ch to end, sl st to next st of foundation rnd 2, sl st in next st] 6 times. 6 petals made.

You will now work around each petal.

Rnd 2: [1dc in other side of chains of petal, 1htr, 1tr, 1htr, 1dc, ch3, working in dc of petals, 1dc, 1htr, 1tr, 1htr, 1dc] 6 times, each petal has been worked.

Rnd 3: [miss first dc, sl st in first htr of next petal, 2sl st, 1dc, [2htr, picot, 2htr] all in next ch-3 sp], 1dc, 3 sl st] 6 times. Sl st to first sl st and fasten off.

Part 2

Make 6 petals in red

Make 10 ch.

Rnd 1 (RS): 1dc in second ch from hook, 1dc in every ch, ch2, working on the other side of foundation ch, 1dc in every ch to end, sl st to first dc. (18 sts)

Rnd 2: ch1, 1dc in first st, 1dc, 2htr in next st, 1tr, 2tr in next st, 1tr, 2htr in next st, 2dc, [1dc, ch3, 1dc] all in ch-2sp, 2dc, 2htr in next st, 1tr, 2tr in next st, 1tr, 2htr in next st, 2dc, sl st to first dc. (26 sts)

Rnd 3: ch 1, 1dc in first st, 12dc, [2htr, picot, 2htr] all in ch-3sp, 13dc, sl st to first dc. (30 sts)

Fasten off

Part 3

The pattern for leaves is the same as for part 2 petals, just in thicker green yarn, make 6 as well.

Making up

Weave in all ends. Place petals of middle part at the back of upper part, so they are positioned in between the upper petals, and sew in place. Repeat the same with leaves. Sew in beads to the centre.

I’m so sorry the pattern is so basic, but I’m suffering with very bad COVID and don’t seem to have any energy for anything at the moment. I’ll do more detailed pattern and video when I feel better. Hope you enjoy making the poinsettia nevertheless.

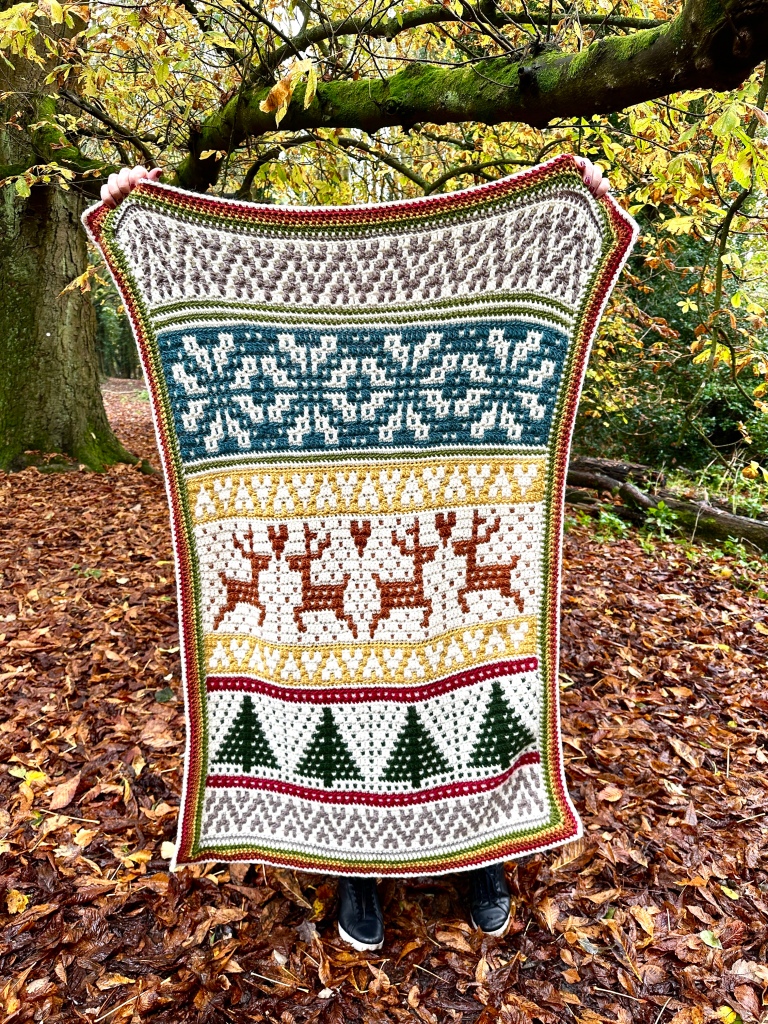
Merry Christmas to those that celebrate, hope you all have the most wonderful time.

Both of us have very bad COVID so unfortunately Christmas is cancelled, we cannot see anyone, we will just try to feel better.

Anna x

Featured

Lapland blanket

It’s finished yeey!!

Lapland blanket

It took me a while to complete it, but I do have good reasons for the delay. working on a new book is one, very excited to share it with you soon. Second is my trip to Norway, Northern Lights cruise to be precise. I’ll be teaching mosaic and slip stitch knitting during it. I love the project I created specially for this cruise. It’s a cowl full of fun patterns and colour play. I tried to choose colour to capture the Northern Lights, hope the participants love it too.

Norway cruise cowl

Anyway, onto the blanket.

I have been absolutely overwhelmed with your reaction to the Crochet Along. Love seeing all your Lapland blankets, colourways and different variations, from cushions to table runners. I want to thank you all for loving Lapland so much.

On my second version I’ve used different colours of WYS retreat for each section.

Here the exact list of colours and rough amounts:

1. Quiet 1015 x 1

2. Adore 552 x 1

3. Purpose 1016 x 2

4. Mellow 221 x 1

5. Serene 452 x 1

6. Tranquil 341 x 2

7. Ponder 393 x 1

And Pure 010 throughout.

For the edging I used all that I had left over.

Part 1
Part 2
Part 3

West Yorkshire Spinners have combined all the parts of the crochet along together. You can download the pattern for free in one – click here – to take you to their website.

Anna x

Featured

Lapland CAL

Finally, the long-awaited summer has arrived! It has chosen the perfect timing to coincide with the start of my winter Crochet-Along, I mean who doesn’t want to crochet with wool in blazing sun 🙂

Not to worry, it will not stay for long and I love seeing your finished parts one of the CAL, crocheted next to a fan no doubt. You all deserve massive applause and an ice-cold drink.

I have designed the Lapland Crochet-Along for West Yorkshire Spinners using their Retreat Chunky yarn. I’m a great lover of this yarn, and it was such a joy to design this blanket.

I wanted it to be truly festive, with trees, reindeer and snowflakes, so when you wrap yourself in it in winter you will feel like you have been transported to Lapland itself. I have been absolutely overjoyed with your reception to this CAL, thank you all so much for all the love.

The CAL will take place over 4 weeks :

Part 1 – Christmas Pines (out now!)

Part 2 – Reindeer rides 13th September

Part 3 – Falling snow 20th September

Part 4 – Wrapping up 27th September

You will need WYS of Retreat Chunky: in Adore x 6, and Pure x 4 and 7mm crochet hook.

The blanket is made using Overlay Mosaic Crochet, and I have also created videos on how to work this technique and finish off the blanket. You will find them on West Yorkshire Spinners YouTube channel.

How to work Overlay Mosaic Crochet

The patterns for Lapland CAL are in digital format and you will find them on WYS website – click here The pattern contains charted and written version of the pattern.

You will also find yarn packs in lots of shops, I have tagged some in my Instagram stories, find them in the highlights in my profile. Please use the #WYSLaplandCAL when you post your pics, so we can all admire your lovely Laplands.

I have decided to make another Lapland, I did make the sample :), but this time I’m using few colours. I have a great stash of Retreat and will be using it for this version. Apart from the Pure, that will stay the same throughout. I have to say I’m loving making the second version as much as I did the first one.

Anna x


Featured

Arendal hat

I have been obsessed with Tunisian crochet, love experimenting with it and combining my knowledge of knitting and crochet.

Tunisian crochet cables have been my favorite for a while now, and I am overjoyed that I was finally able to record a video and write the pattern for this awesome Arendal hat.

The pattern is free below and accompanied by a video. However, if you would like to support me and get an ad-free PDF fersion with a chart, the pattern is available on my website and Ravelry for £1.50

You can find the video on my YouTube channel, it shows you how to create the cables and walks you through the most important stages of making the hat.

Hope you enjoy making the hat, please tag me in your projects on Instagram and fb #annanikipirowicz

Materials

Any aran yarn, I have used 1 skein of West Yorkshire Spinners Croft Aran, you will need around 220 m

5mm Tunisian crochet hook

Cable needle

Pompom of choice approx. 12 cm in diameter

Tension

5 Tss and 5 rows to 2.5 cm measured over Tss pattern using 5 mm hook.

Size

This hat is a snug-fit beanie, if you would like to make it larger, you will need to add multiple of 14 sts pattern repeat, you will also need to make the ribbing longer to accommodate the additional stitches.

If you would like it more slouchy add more rows, please take into account that you will need more yarn if you are adjusting the size.

Each 14 sts pattern repeat measures approx. 7 cm

The finished hat without any stretch and before blocking measures approx. 43.5 cm in circumference and 21 cm in length not including pompom. Please bear in mind that the ribbing stretches a lot.

Abbreviations

Blo – back loop only

Ch – chain

C6B – slip next 3 sts onto cable needle (as for Tss) and leave at the back of work, 1 Tss in next 3 sts, work 1 Tss in each st on cable needle.

Dc (US sc) – double crochet (US single crochet)

St(s) – stitches

Rep – repeat

Tss (Tunisian simple stitch) – insert hook from right to left under front vertical bar of st, yrh and pull loop through.

Tss2tog (Tunisian simple stitch 2 together) – insert hook under two front vertical bars at the same time, yrh and pull loop through.

Tps (Tunisian purl stitch) – with yarn in front, insert hook from right to left under front vertical bar of st , take yarn to back, yrh and pull loop through.

Yrh – yarn around hook

Pattern notes

  • The first and last stitch in Tunisian crochet are always worked the same.
  • First loop on hook counts as one stitch, which means you will always miss the first vertical bar. It is referred in pattern as – miss first stitch
  • The last stitch on forward pass is always worked by inserting hook under the last vertical bar and the bar that lies directly behind it (2 bars on hook) yrh and pull up a loop – and is referred in pattern as – work the last stitch.

Rib

The rib is worked in rows in standard crochet, using dc sts.

Make 12 ch.

Row 1: 1 dc in second ch from hook, 1 dc in every ch to end, turn (11 sts)

Row 2: ch 1 (does not count as a st here and throughout), working in blo of every st – 1 dc in every st, turn.

Rep row 2 further 63 times (65 rows worked in total), turn.

Work in row-ends of cuff.

Pick up stitches onto Tunisian crochet hook from the side of rows, pick up 85 sts evenly along the edge. To work two stitches into one stitch, pick up one stitch under two strands of side stitch and the other from under one strand, please see the video.

Body of hat

Return pass (RtP) is worked the same on every row: ch 1, * yrh and pull through 2 loops on hook, rep from * until you are left with one loop.

Row 1: Miss first st, 1 Tps in next st, * 1 Tss in next 6 sts, 1 Tps in next st, rep from * to end, work end st.

RtP

Row 2: Miss first st, 1 Tps in next st, * C6B, 1 Tps in next st, 1 Tss in next 6 sts, 1 Tps in next st; rep from * to end, work end st.

Rtp.

Rows 3 to 5: Miss first st, 1 Tps in next st, * 1 Tss in next 6 sts, 1 Tps in next st; rep from * to end, work end st.

RtP

Row 6: As row 2.

Rows 7 and 8: Miss first st, 1 Tps in next st, * 1 Tss in next 6 sts, 1 Tps in next st; rep from * to end, work end st.

RtP

Row 9: Miss first st, 1 Tps in next st, * 1 Tss in next 6 sts, 1 Tps in next st, C6B, 1 Tps in next st; rep from * to end, work end st.

RtP

Rows 10 to 12: Miss first st, 1 Tps in next st, * 1 Tss in next 6 sts, 1 Tps in next st; rep from * to end, work end st.

RtP

Row 13: As row 9.

Row 14: Miss first st, 1 Tps in next st, * 1 Tss in next 6 sts, 1 Tps in next st; rep from * to end, work end st.

RtP

The 14 rows form the pattern repeat.

Repeat rows 1 to 10 once more.

Decreasing

Row 25: Miss first st, 1 Tps in next st, * Tss2tog, 1 Tss in next 2 sts, Tss2tog, 1 Tps in next st; rep from * to end, work end st.

RtP

Row 26: Miss first st, 1 Tps in next st, * [Tss2tog] twice, 1 Tps in next st; rep from * to end, work end st.

RtP

Row 27: Tss2tog to last st, 1 Tss in last st, work end st.

DO NOT work a return pass.

Cut your yarn, leaving approx. 70 cm tail, feed the tail through tapestry needle and then feed all the stitches onto the tail. Pull tight to close the opening and weave in the end around the opening to secure. Do not cut tail, but move on to sewing up the hat. I Have found that the mattress stitch method for sewing up is the neatest.

With right side facing, pick up horizontal bar of first stitches from the edge (not the edge stitch), alternating between sides, then pull tight to close the opening. See video for how to.

Before attaching pompom, wet block your hat. Do this by soaking your hat in luke-warm water with a drop of wool wash, squeeze the water (do not wriggle the item) out and place the project on a dry towel, roll in in the towel and pat the exes moisture out. Pin the item on a dry towel, or use an inflated balloon to block the hat. Place the hat on the biggest part of the balloon, making sure that the ribbing is on the narrowest part, allow to dry naturally.

Attach pompom.

If you enjoy Tunisian Crochet, I have a stitch dictionary of Tunisian crochet being published in March through Quatro and Search Press. The book is currently on pre-order on:

Amazon

Search Press

Featured

Granny Square Day 2022

It’s officially here!! Simply Crochet magazine have organised another fabulous Granny Square Day. Join in the fun and help make the largest virtual crochet blanket. Take a pic of your granny square and post it on Instagram with the hashtag #grannysquareday2022. Simply Crochet would also love to see your projects, use the hashtag #grannysquaremakes2022.

If you are looking for a granny sqyare to make, I have designed one speccially for this fantastic day.

This beauty is called Burst and find the pattern below.

Materials

West Yorkshire Spinners Elements DK – 60% Lyocell, 40% Falklands Islans Wool  – 112m to 50G

1 ball of each of the following:

A – Seashell 1100

B – Cherry Blossom 1105

C – Moonlight 1101

D – Cool Aloe 1102

I have used the above yarn but any DK yarn will be perfect to use for the project.

3.5mm crochet hook

Finished size

It is not essential to achieve any particular tension for the project.

The finished square measures approximately 13 x 13cm

Abbreviations

Fpdtr – front post double treble (US front post treble – yrh twice, insert hook from front to back to front around post of indicated stitch, yrh and pull up a loop, [yrh and pull through 2 loops on hook] twice.

Bptr – back post treble (US back post double crochet) – yrh, insert hook from back to front to back around post of indicated stitch, yrh and pull up  a loop, [yrh and pull through 2 loops on hook] twice.

 [] – work instructions within brackets as many times as directed

* – repeat instructions following the single asterisk as directed

Approx – approximately

Beg – beginning

Ch – chain

Ch-sp – chain space

Cstr – chainless starting treble (US chinless starting dc) – Pull up your working loop to approximately the height of a treble stitch, hold the loop on hook with your index finger, turn hook towards you and then around the back, wrap hook around loop. Now you have two loops on hook, yrh and pull through the first loop (the wrap) (still two loops on hook), yrh and pull though remaining two loops. For video please visit the Reels section on my Instagram

Dc (US Sc) – double crochet

Group(s) – cluster of 3 tr

Htr (US Hdc)– half treble

Miss – skip

Rep – repeat

Rnd(s) – round(s)

RS – right side

Tr (US Dc)– treble

Sttr –standing treble (US dc) yrh twice, hold down both loops with finger and tail in hand so they do not unravel, insert hook into st or as directed, yrh and pull up a loop (3 loops on hook), [yrh and pull loop through two loops on hook] twice.   For video please visit the Videos section on my Instagram

Sp – space

Sl st – slip stitch

St(s) – stitch(es)

Yrh – yarn around hook

Pattern note – please read!

This pattern is written using UK terminology with US conversion given in abbreviation list in brackets.

Change colour by sl st with the new colour to end a round, apart from rnd 8.

With colour A make 4 ch, sl st into first ch to form a ring.

Rnd 1: Ctr, 11 tr in ring, sl st to top of ctr. (12 st)

Change to colour B

Rnd 2: Ctr, 1 tr in st at base of ctr, 2 tr in every st to end, sl st to top of ctr. (24 sts)

Rnd 3: Ctr, 1 tr in st at base of ctr, ch 1, miss next st, * 2 tr in next st, ch 1, miss next st, rep from * to end, sl st to top of ctr. (12 ch-1 sp and 24 sts)

Change to colour A

Rnd 4: Ch 1 (does not count as a st) 1 dc in st at the base of ch 1, 2 dc in next st, working in front of next ch-1 sp fpdtr around missed st 2 rnds below, * 1 dc in next st, 2 dc in next st, working in front of next ch-1 sp fpdtr around missed st 2 rnds below, rep from * to end, sl st to first st. (48 sts)

Change to C

Rnd 5: Ch 5 (counts as 1 tr and ch-2 sp here and in rnd 6), 3 tr in same st as ch 5, ch 1, miss next 2 sts,* [3 htr in next st (the fpdtr), ch 1, miss next 3 sts] twice, [3 tr, ch 2, 3 tr] all in next st, ch 1, miss next 3 sts, rep from * twice more, [3 htr in next st (the fptr), ch 1, miss next 3 sts] twice, ending last rep with miss next 4 sts,  2 tr in the same st as beg ch 5, sl st in 3rd of beg ch 5. (16 tr groups)

Change to colour P

Rnd 6: Sl st  in first ch-2 sp, [ch 5 and 3 tr] in same ch-2 sp as sl st, * ch 1, [3 htr in next ch-1 sp, ch 1] 3 times,  [3tr, 2ch, and 3tr] in next ch-2 sp, rep from * twice more, ch 1, [ 3 tr in next ch-1 sp, ch 1] 3 times, 2 tr in the same sp as beg ch 5, sl st in 3rd of beg ch 5. (20 tr groups)

Rnd 7: Sl st  in first ch-2 sp, [ch 4 (counts as first 1 htr and ch-2 sp) and 2 htr] in same ch-2 sp as sl st, * 1 htr in evey st and ch-1 sp to next corner sp,  [2htr, 2ch, and 2htr] in next ch-2 sp, rep from * three more times, ending last rep with: 1 htr in the same sp as beg ch 4, sl st in 2nd of beg ch 4. (20 tr groups) fasten off colour A.

Rnd 8: Sttr in any corner ch-2 sp, ch 2, 2 tr in same space, * 1 bptr around ever st to next corner ch-2 sp, [2 tr, ch 2, 2 tr] in next ch-2 sp, rep from * three more times, ending las rep with 1 tr in next corner ch-2 sp, sl st to standing tr. (108 sts)

Happy crocheting xx

Featured

Hexie Cushion

I have managed to complete another cushion cover to replace the ones I made ages ago, which needed replacing. The previous one was crochet, you can find the blog on it here.

This time I decided to do a bit of sewing. I have missed making English Paper Piecing (EPP), I started a quilt a long while ago which I take out sometimes and wish I had more time to actually work on it properly. I didn’t want to quilt the cushion but use the hexies as an embellishment. My lovely friend, Sarah, has gifted me lots of bits of fabric which was perfect for this. The backing fabric is linen mix which I had in my stash for ages.

I have chosen 10cm (4in) hexies and downloaded the templates from Gathered.com. I’ve created 11 hexies in complementary fabric, sewn them on the front of my cushion cover, then decided to outlined them in embroidery thread outside and inside. You will also find a tutorial on Gathered.com on how to work EPP.

For the inside, I have used 7.50cm (3in) hexie and outlined it with Threaders Heat Erasable pens, which are magic!! I have marked a line first from one corner to the opposite to help me place the smaller hexies centrally. I have used mustard DMC embroidery thread, not sure what colour number it was,found it in my stash, 3 strands and back stitch.

For the outside, I have used a ruler to mark 2.50cm (1in) gaps from the hexies to mark the outlines all the way around, then as before used back stitch to embroider the lines.

Next step was the piping, I was seriously nervous about this bit as I have never done it before, but I shouldn’t have worried it was seriously easy. I cut strips of fabric and inserted the piping cord inside, then stitched in place with the irreplaceable help of a piping foot.

Now to the hard part, I then attached the piping to the back of the front piece of the cover. To work around the corners I have folded the piping like in the second pic below, and it worked a treat!

To be honest, the hard part came when attaching the back piece, I found it really tricky to sew it around the corners, so what I did was just sew three sides and then I hand-stitched around the corners. I also inserted a zip for ease of washing, which I hand sewed in as well.

Of and the cushion measures 50x50cm (20×20).

And hey presto, my new cushion is a great new addition to the sofa.

Anna xx

Featured

Crochet Mosaic Cowl

I have started this cowl around 2 years ago, I worked on it a bit then it got buried under a mountain of WIPs, work crochet and knitting taking precedence. At the end of last year, I decided to make a conscious effort to start finishing all those works in progress. The first on the list was the cowl, and it really surprised me how quickly it worked up.

I have used Rowan Brushed Fleece – Chunky weight yarn – 105m to 50g, 5% Polyamide, 65% Wool and 30% Alpaca. It is a gorgeous yarn, so soft and light.

I have used Rose Degrade 276 (it is discontinued now, but lots of shops still have it on clearance) and Cove 251. 3 balls of each colour and 7mm crochet hook.

My tension is 11 sts and 12 rows to 10cm measured over Crochet Mosaic pattern on 7mm hook.

Length: 25cm in width and 174cm in length, when joined to form a cowl is 87cm folded in half.

I have used the Crochet Mosaic technique, which I love. If you are new to this technique I have done a blog and video on how to work it, find it here

Colour A – Cove

Colour B – Rose Degrade

Please note – I am using UK terminology.

Using A make 27 chainless foundation dc (US sc) – find a tutorial for this foundation on Bella Coco YouTube here

Join colour B and continue working from the chart, changing colours every 2 rows, carry yarns up the side.

Each row of chart is worked twice.

Repeat the 12 stitch pattern repeat once (2 times in total in a row).

The 32 rows pattern is repeated 7 times in total.

When you finish all the row repeats and you are ready to finish off your cowl, work row 32 by working dc and tr as required without creating any spaces.

The chart is taken from the book ‘Charted Knitting Designs’ by the amazing Barbara G. Walker.

I have joined the edges to form a cowl with slip stitch, the foundation row to last row with right side facing.

The edging is worked on the right side into row ends of work in dc and with interchanging of both colours.

Changing colour: change colour st before the colour change, work to the last step before finishing your stitch, when you have 2 loops left on hook, finish off the stitch in contrast colour.

Start with A, ch 1, 1 dc in first st, in B – 2 dc in next 2 sts (colour B rows), miss next st in colour A, in A – 1 dc in next st (colour A row), work in this way until end, repeat on the other edge.

You do not have to join to make a cowl, you can leave it as a scarf, or make the cowl a lot shorter.

Happy crocheting,

Anna x

Featured

Brook Cowl

Winter is certainly biting our toes, the temperature has dropped by a lot, the unusually warm Christmas is a long distant memory. The good news is that we can fully embrace the woolly seasons!! All the hand knits and crochet are out and doing a fab job at keeping us lovely and toasty.

I have a new design in Inside Crochet Magazine (issue 143) which is just the perfect accessory not only for warmth but for the WOW factor (if I can say so myself).

I had an idea for it first at some point in September when we had few really cold weeks. I wanted a quick make and something to keep my neck and chest really warm. At first, I thought of a chunky triangular shawl, anyone who knows me knows I’m a huge lover of shawls in any shape, but a shawl in chunky yarn will have too much bulk as you wrap it around your neck, not to mention the amount of yarn I would have used for it to be a decent size. The next idea was a combination of cowl and shawl, and Brook was born!

The cowl is a quick and interesting make, it starts at the neck part which is worked in simple rows in dc (US sc), without any shaping, then blooms beautifully into a triangular section worked in a combination of stitches with decreases shaping this section. The border is worked on each side of the triangle in a mixture of dc and tr (US dc) stitches, and edging is made of joyful picots. Then the neck part is seamed to form a tube that easily slips over the head and finished off with a round of reverse dc edging.

The version in Inside Crochet is made using Willow & Lark Strath –  70% Wool, 30% Acrylic – 125m to 100g in Navy Blue 13 and Smoke Grey 16 I have used 2 balls of each colour on 6.5mm crochet hook.

I had to make another version, I can see myself making lots more of those cowls. This one is done in West Yorkshire Spinners Retreat yarn – 100% Wool, 140m to 100g in Peace and Pure (2 balls of each colour) with some straight stitches embroidered in Mellow on the neck part. It is a bit tighter than the original version, as the Retreat is a roving yarn and has less drape.

I have been wearing this cowl almost non-stop, it is so lovely and snuggly.

Issue 143 of Inside Crochet with the pattern for the cowl is on sale now, you will find it in most newsagents and supermarkets, they also have a digital version.

Happy crocheting,


Anna x

Featured

Hidden Treasures Crochet Along

I am so excited to share with you my new blanket Crochet Along with West Yorkshire Spinners, Hidden Treasures, which is starting tomorrow (17/01).

The blanket comes in two variations: Two-colour 75 x 75 cm and multi-colour measuring approx. 75 x 98 cm. you can make the as large as you like, but of course you will need more yarn. They are both made out of gorgeous squares and worked using the beautiful WYS Bo Peep Pure. The yarn is DK weight, 100% wool and so soft!!

The CAL will take place over 6 weeks, with a pattern for each square being released every week and the final part being all about the joining and edging. The patterns will be free and available to download from West Yorkshire Spinners website. Each pattern contains a chart and written instructions and is also accompanied by an in-depth tutorial video available on West Yorkshire Spinners YouTube channel.

I have also recorded an introduction video below.

Release Schedule:

Part 1: Cherished Charm
Monday 17th January 11am

Part 2: Forgotten Gem
Monday 24th January 11am

Part 3: Precious Locket
Monday 31st January 11am

Part 4: Trinket Box
Monday 7th February 11am

Part 5: Enchanted Mirror
Monday 14th February 11am

Part 6: Making Up
Monday 21st February 11am

The yarn packs are available from lots of West Yorkshire Spinners stockists, such us:

Hook and Purl – https://hookandpurl.net/products/west-yorkshire-spinners-hidden-treasure-blanket-cal-yarn-pack

Black Sheep Wools – https://www.blacksheepwools.com/search?q=hidden+treasures&type=product

LoveCrafts – https://www.lovecrafts.com/en-gb/p/west-yorkshire-spinners-hidden-treasures-blanket-packs-large

https://www.lovecrafts.com/en-gb/p/west-yorkshire-spinners-hidden-treasures-blanket-packs-small

Wool Warehouse – https://www.woolwarehouse.co.uk/packs/west-yorkshire-spinners-hidden-treasures-cal-two-colour-version

https://www.woolwarehouse.co.uk/west-yorkshire-spinners-hidden-treasures-cal-two-colour-version?___SID=S

And many, many more.


There is a multi-colour version and a two-colour version of the Hidden Treasures blanket, here’s what you’ll need for each:

Multi-colour Version

  • 4 x 50g balls of Natural (010) 
  • 2 x 50g balls of Rosemary (381) 
  • 3 x 50g balls of River (194)
  • 3 x 50g balls of Blackcurrant (319)
  • 2 x 50g balls of Blush (287)
  • 2 x 50g balls of Mist (166)
  • 1 x 50g ball of Sand (208)

Two-colour Version

  • 6 x 50g balls of Natural (010) 
  • 5 x 50g balls of Dandelion (381)

It uses 4.5mm crochet hook.

I will also be on Yarn Lane TV on Saturday (22/01) at 12pm to share with you some techniques. I will showcase the blankets and the yarn packs to purchase.


Don’t forget to share your progress with us using the hashtag #WYSHiddenTreasures on Instagram, Facebook and Crafter’s Hun Community.

I hope you love the CAL as much as I do and I cannot wait to see your squares.

Anna x

Featured

Pumpkin picking

Every year Dave and I promise ourselves that we will visit a proper pumpkin patch, the ones that they actually grow the pumpkins, not just throw few on the field. We kept missing the dates by the time we realised it’s October and time slots for any days that we could visit were fully booked, but not this year! I got on it early and tried to find a good one that wouldn’t cost us a small fortune. Some I came across charge an eye-watering amount, they charge for every aspect individually, when you add parking, visiting the patch, picking and the pumpkins themselves it all adds up considerably.

Then I came across The Patch MK, based in Milton Keynes, and from the pictures it looked amazing, the price was very nice too, so I booked the first-morning time slot when they opened, early on in October. When we got there it was a lovely and misty morning, very atmospheric, the patch was so much more than I expected, it was just awesome! Huge amounts of different varieties of pumpkins to pick, with lovely photo props thrown in. There were even tractor rides for the little ones along with lots of different activities.

My favourite had to be the pumpkin house, which was just a perfect little place for a bit of crochet 🙂

The Patch MK also has sunflower fields in Summer, which we are definitely going to see as well.

Crochet socks 🙂

Anna x

Featured

Autumn wreath

I adore this time of the year! The colours, autumnal smell in the air, it’s my birthday month and not to mention it’s woolly weather. All my shawls and cardigans are out and it’s glorious!!

What autumn also brings is great events and decorations. I’m going all out this year and making as many as possible. I started with crocheted Garland and pumpkins. The patterns are from my book, Crocheted Wreaths for the Home’. I used chunky yarn West Yorkshire Spinners Retreat and 4.5mm hook on the garland.
I made these pumpkins from odd balls in my stash, I used two or three strands of yarn held together and adjusted the hook accordingly. The white one is made from Retreat and Colourlab held together, the orange is from Felted Tweed, some 4 ply and DK, both of the above are made on 6.5mm hook. The yellow one is made with Felted Tweed and Signature 4ply held together on 5mm hook. The green bits are Retreat and Felted Tweed on 6.5mm. Great little stash busters.

I also decided to make a wreath for my door. Not crochet, but from the rich bounty nature offers. I picked up some oak leaves and conker casings from my local park. I brought the wreath base few weeks back, it was on sale, don’t remember where though, but it’s just a standard grapevine wreath base. The wheat stems I had in my stash from when I was making the Harvest Wreath.

I attached the wheat with craft wire, then placed some oak leaves to cover the wire joint, which I also attached with wire, then covered that joint by glueing some conker casings around to hide joint using glue gun.

Then attached some more oak leaves around the casings with stems of leaves placed underneath them and hey presto! It all took me around 20 min. Supper quick, very affordable and I hope you agree that very eye catching.

Happy autumn

Anna xx

Featured

Cushion cover

My handmade cushion obsession continues. I’m determined to change the older cushions that I made ages ago which are rather washed out and worn.

Also, concentrating of other makes takes my mind of the missing parcel which Parcel Force still haven’t found. I am now trying to face the hard truth that the item are now truly lost and I need to organise re-making of the items as I cannot wait any longer for them to find it, it’s been exactly a month since they lost it.

My new addition to the cushion family is this beauty.

It has crochet squares on the front and is backed with fabric on the other side. I have also sewn in a zip for ease of taking out the cushion pad when washing.

The pattern for the crochet squares I designed for LoveCrafts last year for the International Granny Square Day.

You can find it here and it is also accompanied by a step-by-step video.

I have used Rico yarns, Creative Melange DK in shade Pastel Mix (001) as colour A and this yarn totally makes the squares, because of the gentle colour changes each one looks so different. For colour B I have used Superba Luxury Alpaca Socks in shade Silver (004)

I have made 9 squares in total joined them with slip stitch in back loop and finished off with an edging which is one round in dc (US sc) and one round picot edging: 1 dc in next 2 sts, picot (ch 3, sl st in first ch), work this all the way apart from corner chain spaces, (1 dc, ch 2, 1 dc) in corner spaces.  

Happy crocheting,

Anna x

Some of my handmade cushions
Featured

Self-care when crafting – support

It is time for my final blog post in the self-care when crafting series.

You can read the other post by clicking on the titles: good tools, exercise, entertainment, strength training.

In this part I would like to talk about hand and wrist support. As avid knitters and crocheters we have all been there. Trying to finish off that project, and one more row turns into good few hours. The next day your hands are swollen and painful. This is most probably caused by repetitive strain injury (RSI), you can even develop sharp stabs that accompany this sort of injury. Sometimes you may find you have lost sensation in your hands.

Theses are unfortunate realities for many knitters and crocheters and any signs of pain and discomfort should be treated medically. With RSI, prevention is better than cure, and regular stretches and breaks can help prevent that, as I explained in my exercise blog.

To be brutally honest you should treat it as a sign to give your hands a much-needed rest, so they can recover. The sensitive and swollen tendons can repair fully. But as all of us know, finishing this project takes precedence over everything.

Lots of knitters and crocheters turn to compression support for their painful hands. I have used them as well when working on my last book.

There are plenty on the market to choose from. I personally like the fingerless ones as I feel I have more control over the yarn. Some people swear by the gloves with only the tips cut off on fingers or the braces.

When I decided I needed support, I went for the standard, cheap elasticated tubular support you can buy at any chemist and most supermarkets. The ones you cut the whole in for your thumb. I have to say it worked really well for me.

Then my lovely husband upgraded it to CS Medic one with the thumb hole already cut out…. fancy!!

Both of them have served me really well.

You can now buy some amazing compression support that lots of people find useful. Below is a list I was recommended. I have not used them myself but heard from people who have.

Compression gloves help relieve the aches from knitting and crocheting, especially when you have arthritis, they protect your hands and cushion the repetitive movements. They are designed to support vital parts of your hands.

1: Lion Brand Stress Relive Gloves – Fingerless, they are designed to enhance blood flow and massage muscles.

2: Crafter’s Comfort Gloves – Made from a seamless, lightweight, soft cotton/Lycra® compression knit. The unique design helps improve circulation, reduce swelling, and relieve arthritis pain. They are open finger design.

3: Neo G Comfort/Relief Arthritis – Two types of interchangeable, adaptable, multi-purpose gloves for optimum mobility, flexibility, warmth and comfort. Open Fingertip Design for freedom of touch, feel and grip.

4: Rehband QD Knitted Wrist Support – It is designed to relieve pain and reduce inflammation; it is lightweight so allows a greater level of movement.

Disclaimer: I am not a doctor, and the information here and the blogs in self-care series does not constitute medical advice. It’s just helpful tips from me and some of my friend who use the hands supports, as we have experienced pain from crocheting and knitting.

Anna x

Featured

Self-care when crafting – strength training

My penultimate instalment of self-care when crafting blog is about strengthening those muscles in our hands, wrists, and arms.

In my second blog I wrote about exercising and stretching, you can read it here

Read all the posts in self-care series by clicking on their titles: good tools, entertainment.

Before I start, below I describe what I have done and still do, this is what helped me build muscles and prevented my hands from hurting after long periods of knitting and crochet. Everyone is different, what worked for me will not necessarily work for you, try different options, but I do hope you will find this post useful.  

When I started suffering with pains, I decided to do something about it and devised my own training plan. Regular stretches are essential but in a long run training your muscles is vital.

There are so many hand resistance aids on the market it is difficult to choose what will suit you best. I started with the inexpensive ones which I found to work for me really well and I never needed to upgrade them.

1: Finger resistance bands

They are fab to regain strength. My husband first suggested them from when he used to use them to train his hands when paying guitar. They are also used in therapy for sufferers of arthritis, carpal tunnel or in rehabilitation in recovering from wrist injuries.

I find that they work so well on not only my fingers and wrists but also lower arm and elbow.

They are made out of silicon which makes them super easy to keep clean.  Very portable, you can take them with you and use whenever you like. They come in three strengths from 3kg to 5kg, I started with the lowest.

I got my ones on eBay, find them here

2: Rubber egg hand exerciser

Stimulates muscle growth, really improves forearm strength which is very important when you knit and crochet as our elbows are constantly bend and arms don’t really move that much, so it is vital to exercise them. Doubles as anti-stress toy.

I got my one in John Lewis, find it here

3: Dumbbells

I found them brilliant for wrist strengthening. They come in a selection of weights. I started with 1 kg and moved up slowly to 3kg, will probably not go any further with weight, as I find 3kg very comfortable not only for wrist exercise but also for upper arms and shoulders.

I use exercises by ‘Healthline’ for wrists, find them here

Good ones are also by ‘Verywellhealth’, find them here

For arms and shoulders, I found exercises by ‘Women’s Health’ very useful, find them here

I purchased my dumbbells from Argos, find them here

Massages

Exercises are great, but releasing tension by massage is also very important, especially from the shoulders. I sometimes found myself wondering why are my shoulders always so tense, then would catch myself crocheting or knitting with back bent and shoulders slumped, that would be why then.

Massage rollers

Before the pandemic I would sometimes go to my local salon for shoulder and arm massage, but I have to admit I didn’t do it often enough to see long term benefits. My husband would sometimes massage my shoulders for me, just to release the tension. However, what we both found very useful to use are massage rollers. You can use them by yourself, or someone can do it for you. They are perfect for getting those tense knots untangles.

I know there are a lot of electronic massagers on the marker, but I have to say I haven’t tried any of them, so cannot give my honest opinion.

I usually use my one with oil, I find that the lavender facial oil by Garnier works so well, before I discovered it, I used baby oil.

The rollers are super simple to use. Obviously, you would do it with your shoulders bare, but for pic purposes I’m showing you while wearing cloths. With right hand massage your left shoulder and vice versa.

I have them in two sizes, large and mini. They are made by Omni. Large is good for over all shoulder, mini for precision massage on those tight spots.

Find the larger rollers here

Mini here

Finger ring massager

This is amazing!! It was gifted to me by my lovely friend Mary. The ring applies pressure to individual fingers stimulating blood flow while rolling out stiffness and the other targets specific areas of pain in the fingers. They are a game changer. You know when you stroke a cat’s chin and it responds with this incredibly satisfied expression, this is what it’s like using the finger massager. It is absolutely fantastic.

This is the face I am talking about 😀

Just roll it from the tip of your finger to the bottom and back to top, work every finger.

Find them on eBay – here

Body wrap

Another fantastic gift from Mary, she’s such and amazing friend. I suffer a lot with my lower back pain, I damaged it few years back and now it can flare up for any reason, the wrap is perfect for it. It can be used hot or cold, it’s completely natural with wheat and lavender.

I use this wrap a lot on my shoulders as well to relax the muscles. The shape is perfect to lay across your shoulders.
Simply pop in the microwave as per the recommended guidelines and apply heat within a couple of minutes.

Find the body wrap here

These are my routines and ways of helping me to strengthen and relax the muscles in hands, arms and shoulders. I want to crochet and knit comfortably for many years to come and hopefully these exercises will keep me pain free. I hope you will find them useful too.

Anna x

Featured

Self-care when crafting – entertainment

Time for the third instalment of self-care when crafting blog series, and this one is about entertainment.

You can read the previous blogs by clicking on their titles: good tools, exercise.

Let’s talk about keeping ourselves entertained when we get stuck in into our favourite craft, I mean don’t get me wrong creating is joyful enough, but I’m talking more about keeping our ears entertained. Whether it will be a good TV show, film, audiobook, podcast or just listening to music, there’s nothing better than getting engrossed in a good story or sound and crafting! Best of both words.

A good story or sound can really enhance your crochet or knitting experience, especially when you are trying to de-stress. Sometimes we have events happening in our personal life that can really take a toll on us, knitting and crochet is a wonderful way to escape, a form of mindful meditation. The simple act of repeating stitches, and focusing our minds can do wonders to calm us down, and shut out the outside world, even if it’s just for a short while.

Crochet and knitting, just like listening to your favourite song, flips on your happy switch, and you instantly feel better. Now imagine combining those two!!

So, what to do when crafting

1: Watch

I’m a huge fan of detective shows, my favourite ones are the ones with a bit of humour and good story, not so keen on the silly ones. I think I have binged while knitting or crocheting on most of my favourite ones, from Vera to Maigret.  The one I keep coming back to the most and constantly keep re-watching are The Brokenwood Mysteries, brilliant series from New Zealand with the most fantastic soundtrack. Always a good story with amazing cast. I have been going on about my love for this show so much I’m now converting everyone, not to mention having the songs on repeat.

Vera also never disappoints, not as much humour, but boy are the plots good!! So well-acted and made, absolute pleasure watching. My tension quite often tightens when watching Vera as I get so caught up.

The Coroner and Maigret are also very good, I’m just so disappointed that they only got two seasons, there is still so much to explore with those two shows, big shame that BBC and ITV didn’t see their worth. Maigret was an adaptation of the books by Georges Simenon, and luckily some of the books are in audio form.

I’m not only a fan of crime dramas, but I do also love comedy as well. I’m currently rewatching Dinnerladies, I miss Victoria Wood so much!!

You can watch a lot of programs on catch up, each channel has one, I think. There is always UKTVPlay which is free and full of great shows like my favourite detective show and a drama series called ‘A Place to Call Home’. It’s not a series I would normally watch, I try to avoid overly emotional shows, ones that I cry non-stop while watching, but it was recommended to me and oh my. A stunningly cast show, set-in post-war Australia, it was an emotional roller coaster, I actually didn’t do any craft while watching as I was too busy crying!! The story, the acting just SUPERB!!

Anyway, I better move on before I start listing all my favourite shows and let’s talk about podcasts.

2: Listen to podcasts

I always welcome recommendations for new knitting and crochet podcast, I listen to them often.

There are quite few out there now and exploring is part of the fun. They are a great way of keeping in the know what’s happening in the yarn world.

Some of them are only available to listen, some you can watch on YouTube. I wrote in brackets which ones apply to each, Audio or Video.

A few of my favourite ones are:

Crochet Circle (audio)

TL Yarn Crafts (video)

The Grocery Girls (video)

WoolWork (audio)

The Marly Bird Yarn Thing Podcast (video)

Gaye Glasspie (video)

The Lovecraft Show (video)

The Knitting Pipeline (audio)

EarthtonesGirl (video)

The Fat Squirrel Speaks (video)

3: Audio books

I used to devour books, read constantly, but since I started designing my time is usually taken with crochet or knitting and unfortunately, I have not mastered the art of reading while crafting. It is a lot easier to achieve with knitting, especially on a plain stitch.

However, audio books are now my best crafting companion. As with TV shows, detective stories are my most listened, especially Raymond Chandler, my all-time favourite crime writer.

LibriVox has a vast free audio books library, with many amazing titles, lots of classics, all read by volunteers from around the world. They are a free service relying on donations, if they bring you lots of joy, please consider donating to keep them going.

For any other titles Audiobook.com are fab, they are subscription services, and have a fab selection.

Listening device

With all the wonderful shows, podcasts, and audiobooks to listen, good earphones are vital. Of course, you might not need them if you are listening by yourself. I find using earphones very beneficial for immersing my self fully in a story and my craft.

For years I have used the ones connected with wire, that kept getting in the way and I kept forgetting about them and whenever I stood up, they would painfully pull out of my ears. However, they are so easy to use, just plug in and hey presto. That’s why I kept avoiding wireless ones, kept thinking they are just too fussy to set up. I’m more of a ‘turn it on and off again and see if it works’ kinda girl, my husband is an IT technician so I always have someone to fix my tech issues, and there’s plenty of them, but I still avoid anything that will require me to read an instruction booklet. That’s why I think I keep getting iPhones, not because I like them, but I’m used to them and know exactly how to set one up and use it.

I sometimes get approached by companies wanting to send me things. I know how it works, they send me something for free and in return they get advertising. I rarely accept, but when Sudio contacted me, I just couldn’t resist. I was in the market for new earphones not only because the wire on my ones was going and only one of them worked, but also because their ones are completely wireless!!

I chose Sudio Nio, and what a sound revelation! The buds have an open-ear design, so they are not too snug, for me this is perfect as I dislike the pressure of ear tips in my ear canal which always feels really uncomfortable. They also come with wingtips for more comfort and security, they won’t fall out when commuting or exercising. I felt no discomfort at all from wearing them for good few hours. The sound quality is amazing, but still allows me to be aware of my surroundings, which is perfect for me when commuting.  They also offer great controls, Nio’s function can play, pause, skip to next song, adjust volume, answer, decline, and end call. I have tried them on few Zoom classes, and they were fab!! They are also really pretty. It’s a bit like buying knitting or crochet accessories, the appearance makes no difference as long as they perform their function well, but we all know it really, really helps 😀

Most importantly they are super easy to set up! Connect to your Bluetooth, find them in drop down and hey presto! That’s it!!

Also, they are very affordable comparing to other brands offering wireless earbuds. I’m not a person who is willing to spend hundreds of pounds on earphones…. On yarn yes, but earphones no.

The lovely people at Sudio are offering my followers 15% discount across their site (link below) if you use the code Crafthappy21, they are also currently offering a free tote bag with every purchase which is perfect to carry larger WIP in, it also has a pocket inside for scissors, hooks and other bits, but hurry the bag offer ends in August or while stock lasts.

Sudio website: https://www.sudio.com/gb/

Brick has immediately claimed the bag as his own!!

Tomorrow’s blog post will be all about resistance aids for training hand and arm muscles.

Anna x

Featured

Self-care when crafting – exercise

My second instalment of self-care while crafting blogs is about hand, wrist, and arm exercises.

I spoke about good tools to make our crafting easier on our hands, read the blog here

Now let’s talk about keeping our hands in good working order by regular and gentle muscle exercises that anyone can do.

Firstly, discipline is a vital part of preventing our hands from hurting. If you craft daily, then you must commit to stretching and exercising your hands on regular basis through however many hours you craft. Trust me it will really help in a long term.

I have seen few crafters adapting the Pomodoro Time Management Technique, you can read more about it here

I really do not remember who I saw using this technique first, but I decided to give it a go. I’m also a terrible procrastinator and will find hundred other things that need my attention than the fifty squares that need crocheting. This technique really helped me to stay focused and I realised that I was so much more productive and in return felt better about my self as the guilt of wasting time was gone. Don’t get me wrong, I am not that disciplined! I still want to start seventy new projects after finishing just one WIP from a pile of eighty.

In the Pomodoro Technique you alternate focused work sessions with frequent short breaks. You set your timer for 25 minutes and in this time you work only on the task you have set yourself, after this time you have a few minutes break, then get back to another 25 minutes of focused work session. After 4 of those sessions, you take one longer break. You can adapt this technique to any tasks that requires you focus.

I have found that it works incredibly well when crocheting and knitting, because the time alerted me to stop, drink water, stretch and do hand and wrist exercises, which resulted with no aches in a long term.

You can adapt it to what suits you best, I usually set the alarm for 30 min, then sent the alarm for another 5 min which is my break. When I was working on the Folk Tales blanket, it took me 45 minutes to crochet 1 square, after it was completed, I had a break, drank some water, exercised, went back, crocheted another square and I did not stop until the square was completed.

Why do we need regular breaks when crocheting and knitting? if you are like me, then you probably craft while sitting in your favourite armchair or spot on the sofa. After a while you realise you have been sitting in the same position for ages most often because you are engrossed in a good program or an audiobook or just trying to follow a difficult pattern, when you get up everything is stiff, and you need a good stretch.  Also, your elbows are constantly bent, shoulders slouched, your hands and writs repeat the same action over and over, perfect recipe for repetitive strain injury. Therefore, regular stretches and exercises are vital, and this is why I find the Pomodoro Technique so useful.

Exercises

You can do these while sitting down or standing up. Keep your arms straight, hold hands in front of you, place your right hand on the back of the fingers of left hand and gently push fingers towards you, repeat the same on the other hand. Then place right hand on the front of the fingers of left hand and push gently towards the floor, repeat on the other hand.

Roll your fingers into a fist and make full circles with your wrists, few times to the left then right.

Place the palms of your hands together, all your fingers in line together, then push the palms away so that only the tips of fingers are touching each other, stretch those fingers far apart and repeat few times.

Intertwine the fingers of both hands so they form a large fist and swing them in half circle movement.

Then shake your hands to loosen up and rest.

With your arms outstretched, wrists facing up, make fists and gently push them towards the floor, this gives you a nice stretch on your arms and elbow.

Below is also short video to show you these and few more exercises. They only take a minute or two, but are very beneficial, well they are for me any way, hope you also find them useful.

Every few hours of crafting I include also a good stretch: Stand up, put your arms up and stretch high like you want to touch Michelangelo’s celling masterpiece in Sistine Chapel, put arms down and roll your shoulders back few times then forward loosing up all this tension, then make nice big circles with your hips few times clockwise then anticlockwise. Finish off with stretching your back by bending forward and outstretching to touch your toes.

I also found very beneficial the muscle fascia stretches on knitfreedom.com blog, find it here

I do them once a day, they are quick, but were amazing for my recovery whenever I overdid it.

Hope you find my tips useful. They work for me, but everyone is different, and you might find better ways to keep your hands, wrists and arms pain free.

On Sunday I’ll talk about strengthening hand and arm muscles with inexpensive resistance aids.

However, tomorrow will be all about entertaining our ears when crafting and I also have a lovely discount offer on some earpods.

Enjoy,

Anna x

Featured

Self-care when crafting – good tools

For the past few months, I have been crocheting and knitting like a woman possessed, I have almost completed all the work on my new book, yeey! I’ve also contributed to another book, taught lots of classes over Zoom with lots of samples knitted and crocheted, not to mention all the commissions and projects in-between. All of this started to result in aching hands and shoulders, not to mention the need to keep my stress levels down, not only due to things happening in my personal life, constant rising COVID cases, but also to patterns that still needed to be written and approaching deadlines, which is not helped by my projects not working out and needed to be frogged, adjusted, then started again! Aaaaggggrrrr!

The need to exercise my hands, shoulders and to de-stress has become paramount and I was making a conscious effort to do those things every day so it now has become a welcome routine. Over the next few days, I am going to publish a blog each day covering different topic of self-care while crafting, from good tools to exercise.

I want to begin the series of blogs with a look at good tools, which are a vital starting point in taking care of your hands. If you crochet and knit on regular basis then I am sure you have acquired a vast collection of crochet hooks and knitting needles. Some of us start out craft journey with inherited tools or by purchasing the basic sets, they usually are the aluminium Pony hooks and needles, they are very affordable and great starting point. However, as we craft more and more we update our basic tools to ones that are not only easier on our hands but also enhance our craft experience. There are 100s of different types of hooks and needles out there. Choosing the right one can be quite overwhelming and to be honest you will not know if the hook or pair of needles is right for you until you try it.

Matt Spiers has written a blog post for Gathered, listing the best crochet hooks, find the blog post here

Sarah Winsper has written one on knitting needles, find it here

Whichever hooks or needles you choose it is your personal choice and if you are happy then that’s the most important thing. I would like to share my personal experience with crochet hooks and knitting needles.

Crochet Hooks

A few years back I wrote a blog on the materials crochet hooks are made from, find it here

After years of crocheting, I’ve settled for my favourite hooks which were Hiya Hiya, they are aluminium and come in array of colours, the point is sharp enough to go into stitches easily and they were my best crochet friend for a long while.

I was also using a lot of wooden hooks by KnitPro Symfonie and Brittany. I like Brittany as they have a sharp point and are quite deep, so grab the yarn really well, not to mention that they are beautifully decorative. However, I know that some people do not get on with them. The same is with KnitPro Symphony, again sharp point and are quite deep. I used to change my hook depending on what thickness of yarn I was working with, so for 4py, DK, Aran weight yarns I would use Hiya Hiya, for lace, mohair I would use the wooden ones and for chunky and super chunky bamboo. It was also very important that the hooks had to be long enough to fit well in my hand, using hooks that are too short was hurting my hand after a while. I hold my hook like a knife therefore the length of hook matters. If you hold your hook like a pen it probably won’t make any difference.  Then I realised I started to favour the wooden hooks a lot better and started using them for everything. I found that the wood was so much softer on my hands, absorbing the movement a lot nicer and my hands weren’t hurting.

I tried the Clover Soft Touch and KnitPro Waves hooks with the plastic handles, but unfortunately, I didn’t get on with them. I know lots of crocheters who adore them and use nothing else, but I found them both too short to fit in my hand comfortably, the plastic handle was hard on my hand and most importantly the hook part was too short before the handle begun. I swing my hook quite deeply into the stitch and when I go yarn around hook, it’s all very dramatic, so the handle used to stop me from reaching a satisfactory conclusion to my stitch. To be honest I should have given the hooks a bit more of a try and I’m sure my crochet technique would have adapted.

Then I discovered the rubber-handled hooks with aluminium tips and oh my what a revelation. I first tried the hook from Yan & Colors and for me it was instant love, the hook was perfect length and it suited my hand, the handle was soft and absorbed the movement of my hand. Even though the length between the hook and handle is the same as in KnitPro Waves somehow they just worked so much better for me. Probably because the handle is softer and it was so much easier on my hand. They come in 3 colours of aluminium, silver, rose and gold, the rose tarnishes very quickly so I now only go for the silver ones.

Prym also has a very nice soft handle hooks which are truly lush too, the hook handles beautifully. They have an ergonomic range as well which is on my list to try.

Sirdar has a nice soft handle range and Rowan just brought out a new collection of wooden handle hooks with aluminium tips…. So many hooks so little time!!

Knitting needles

When I started to knit again, as most people, I used straight knitting needles, which are fine unless you are knitting a big project then they can get heavy. Even though I used to go for the shortest length they still constantly thumbed the arm rest. Then someone suggested circular needles and WOW my knitting life was transformed!! The difference on your hands when you switch to circular is immense! No more wrist pains just absolute pleasure when knitting. Your work is nicely distributed on the wire so your wrist to not have to take all that weight as they would with straight needles.

The only time I use straight needles now is when I am making a small project and for that I have a set of the cutest kids needles KnitPro Trendz, which are 18cm in length and just fab, but they do occasionally squeak, I don’t think they make them in that length anymore.

Most commonly available circular needles are KnitPro Symfony, which are made from laminated birch wood and they have gorgeous colouring. They come in fix or interchangeable variety and are just lovely on your hands. However, I did loose quite few by accidentally breaking them and some lost their fight with my cats teeth.

The Knit Pro also has a beautiful set of Symfonie Rose needles, made of laminated Birch wood in a simulated Rosewood finish which my lovely husband has gifted me one Christmas and they are  my favourite needles.

Not only wooden needles are good on your hands. Addi Click circulars are brilliant too. They are made from lightweight plated hollow brass, the polished needles slip under stitches easily as the tips taper to a nice sharp point, makes them perfect for speed knitting.

ChiaoGoo are another of my favourites. They are lightweight metal needles, very sharp with smooth sating-sheen finish, ideal for lace and sock knitting. Also, wonderful on your hands.

Pony has a great range of Maple wood needles and Rosewood ones. I’ve tried the Maple wood ones and they handle beautifully, very light with nice sharp points.

Pony also has a range of Bamboo needles, which are far more affordable than the above ones. They are nice and light, but I did find that the tips of them blunted quite quickly

Whichever tools you choose they must do the job perfectly for you and most importantly the musn’t hurt your hands, wrists and arms. Regular brakes and exercising your hands in between crafting sessions is vital, but more on that in next post.     

Anna x

Featured

Folk Tales Crochet Along

I am so excited to finally be able to share with you my new Crochet Along in collaboration with West Yorkshire Spinners.

The CAL starts tomorrow (12th April) and will run over 5 weeks, revealing a new square over 4 weeks and the last week will be all about joining and finishing.

CAL Release Dates:

Part 1: Bright Bobbles
Monday 12th April 11am
Part 2: Twists & Trebles
Monday 19th April 11am
Part 3: Scripts & Spikes
Monday 26th April 11am
Part 4: Magical Mosaic
Monday 3rd May 11am
Part 5: Making Up
Monday 10th May 11am

Patterns will be available from 11am each Monday.

This blanket is all about textures and interesting effects. I didn’t want the squares to be overwhelming with lots of colours used per square, but more of what you can achieve with only one or two colours. There will be spikes crochet, bobbles, mosaic and of course front post trebles. Vast array of fab and engaging techniques. Which together with the vibrant colours of ColourLab yarn range produce a striking and modern blanket.

The patterns will be available on West Yorkshire Spinners website and the videos for each part along with introduction from their YouTube channel.

Folk Tales uses the beautiful ColourLab DK, anyone who listens to me will know that I’m in love with that yarn. It is what I call everyday yarn, it is perfect for blankets, garments and anything you can wish for. The yarn has gorgeous and vibrant colours and WYS just added a few more to the range. In the blanket, I have used 4 new colours: Coral Crush, Bottle Green, Electric Blue, Perfect Plum and the all-time favourite Silver Grey.

For the blanket I have used: 5 x Silver Grey, 2 x Coral Crush, 1 each of Electric Blue, Perfect Plum and Bottle Green. With such beautiful range of colours we are really spoiled for choice, the possibilities of colour combination for your Folk Tales are endless, and I cannot wait to see your squares.

If you would like to stay with the colour choices I have used, then you can buy the yarn packs from WYS or lots of their stockists:

Black Sheep Wools, Folklore Yarns, Deramores, Knit & Stitch, Smalls Crafts, Polly Knitter, Wool Warehouse and many more.

Let me tell you a bit about the inspiration for Folk Tales; The name represents old traditions of crochet and other handcrafts, where past generations would sit and make together while telling each other old folk tales. I encourage you to continue the tradition of storytelling while crafting. Maybe dedicate an hour a day or week to spend with your family, friends, or even by yourself to make each square, giving it its own story, with each technique providing a new twist in the tale. Both the blanket and the story can be passed down and cherished.

I also wanted this blanket to have a modern twist in the design to symbolise the here and now. The modern shapes and bright colours bring a modern edge to this traditional craft.

I have also created an introduction video which is on WYS YourTube channel, you can watch it below.

And please use #wysfolktales to share your squares and stories with us on Instagram and Facebook. Please also tag @westyorkshirespinners and me @annanikipirowicz

You can also join WYS Ravelry group: https://www.ravelry.com/discuss/west-yorkshire-spinners/4121720/1-25

or

WYS Crafter’s Hub on Facebook to crochet together with like-minded people: https://www.facebook.com/groups/wyscrafters

And please don’t forget to give Folk Tales CAL a heart on Ravelry 🙂

I cannot wait to share with you the first square tomorrow 🙂

Anna xx

Featured

Christmas crochet

With everything that has happened this year it was very important to me to make this Christmas very special with as many handmade decorations and presents as possible. I also wanted to share as many patterns and tutorials with you as possible, so that seasoned and new crocheters alike can find something special to make.

Winter wreath

This blog is really to put all the makes together, so you can find them all in one place.

It all started with this gorgeous frosty wreath for John Lewis & Partners. The leaves and berries are taken from my book, ‘Crocheted Wreaths for the Home’.

You will find the video tutorial on John Lewis website or just click here

I also taught a lovely virtual class over Zoom for them, it was all about crochet snowflakes. I uploaded the video to my YouTube and IGTV so that it’s a good reminder for everyone who attended the class and now everyone can make a snowflake.

You will find the written pattern and chart here

Next up is the lovely Mistletoe wreath I made for LoveCrafts. I show you how to make the whole wreath from the base to crochet leaves, berries and how to put it all together. The base is made from ivy vines and is super easy to make.

You will find the written pattern here

The video is on LoveCrafts YouTube channel here

The final Christmas tutorial is for the adorable crochet stockings which are taken from the Christmas wreath from my book.

I made them into a garland for Search Press, they are super fun to make and perfect for using oddments of yarn.

You will find the video here and the written pattern here

The stockings take me nicely to my biggest Christmas make of this year…..my super-duper fabulous Advent Calendar. I’m completely late with it, but I didn’t actually think I would finish it this year, so I still count it as a win.

The pattern is the same one as for the lovely stocking for Search Press and from my book, but I have used thicker yarn and hook. The yarn is West Yorkshire Spinners Retreat on 6 mm hook. I have embroidered the numbers, very badly, with DMC gold metallic embroidery thread, number E3821. I have never embroidered with this thread and oh my it is not easy at all! I started with split stitch and ended with whatever, by the time the first few numbers were done I had enough and just used any easy stitch. I didn’t mark out the numbers first I just did it by eye, that’s why they are all different sizes, but I actually like them like that.

When all the stockings were finished I joined them together in 4 columns with strands of the same yarn by just attaching them with knots. Then attached them to the base of the wreath followed by some small baubles which I knotted to lengths of yarn and then to the base of the wreath and added a few to the stockings.

The wreath and baubles I bought in Home Sense a few weeks ago, they have such amazing decorations. The wreath is fab because it has a wire base, so it was easy to attach the lengths of yarn with stockings and baubles.

I finished it off by adding some fairy light to the wreath and hey presto!

I am overjoyed with the Advent Calendar and so happy I finished it before Christmas.

Merry Christmas and happy making,

Anna x

Featured

Mistletoe wreath

I am sure you have probably already realised that I love a wreath and mini ones are the cutest. I’ve created this wreath for LoveCrafts from scratch. The base is made from ivy vines and the leaves and berries crocheted.

You will find the full vide tutorial on how to make every part on loveCrafts YouTube channel

Below is the written pattern for the leaves and berries

Materials

Painbox 100% Wool Worsted

B – Cream

A – Slate Green

3.50mm crochet hook

Pattern note – Pattern is written using UK terminology with US conversion given in abbreviation list.

Abbreviations

Ch – chain

Dc (US sc) – double crochet

Htr (US hdc)– half treble

Htr3tog (US hdc)– half treble 3 together – [yrh, insert hook into next st or as directed, yrh, pull up a loop] 3 times, yrh, and pull through all 7 loops on hook.

Sl st – slip stitch

Yrh – yarn around hook

Leaf (make 14)

With A make 12 ch

Rnd 1: sl st in second ch from hook, * 1 dc in next 3 ch, 1 htr in next 3 ch, 1 dc in next 3 ch *, sl st in last ch, ch 1, working on the other side of foundation ch, sl st in first ch, rep from * to *, sl st in last ch.

Fasten off.

Berry (make 8)

With B make 3 ch, htr3tog in third ch from hook, ch 2, sl st in same ch as htr3tog.

Fasten off.

Weave in all ends.

I blocked the leaves by pining out and steaming then used glue gun to attache them to the wreath.

Happy making,

Anna x

Featured

Crochet Snowflake

I have taught a lovely class yesterday to My John Lewis customers. It was my first class over Zoom and it was a lot of fun.

I promised to post a video on how to make the snowflake as a reminder to class participants and it’s a perfect opportunity to share the snowflake with everyone.

Below you will find the written pattern and chart and the video is on my Instagram IGTV and Facebook page. I’ll post the video with subtitles onto my YouTube later on.

Crochet Snowflake

Materials

Any Double Knitting yarn would be great to use for this project.

3.00 or 3.50 mm crochet hook, size depends on your tension. If you are loose crocheter use the smaller one, if your crochet is tight use the bigger one.

Finished size

After blocking – approximately 8 cm from point to point across.

Abbreviations [] – work instructions within brackets as many times as directed * – repeat instructions following the single or double asterisk as directed Ch – chain Ch-sp – chain space Dc (US sc) – double crochet (US single crochet) Htr (US hdc) – half treble (US half double crochet) Miss (US skip) – omit st(s) Rd(s) – round(S) Rep – repeat Sl st – slip stitch St(s) – stitch(es) Tr (US dc) – treble (US double crochet)

Pattern note

  • Pattern is written using UK terminology, with US conversions given in brackets in abbreviation list.

Snowflake – written pattern

Ch 5, sl st to first ch to make a ring.

Rnd 1: 4 ch (counts as 1htr and ch-2 sp), working into the centre of your ring, [1htr, ch2] 5 times, sl st to second of beginning ch2.

(6 ch-2 sp)

Rnd 2: sl st to first ch-2 sp, ch 1, [1dc, 1htr, 1tr, ch3, 1tr, 1htr, 1dc] all in the same space, * miss next st, [1dc, 1htr, 1tr, ch3, 1tr, 1htr, 1dc] all in the next space, rep from * until all spaces have been worked,

sl st to first dc.

Rnd 3: sl st in next 2 sts, so you reach next ch-3 sp, sl st in ch sp, 

* ch3, sl st in same sp, ch5 sl st in same sp, ch3, sl st in same sp, ch 3, sl st in next ch-2 sp, rep from * until all spaces have been worked, sl st to first space.

Fasten off.

Loop

Join yarn to any ch-5 sp created on last round, ch 15 and sl st to same sp.

Making up

Weave in all ends using tapestry needle.

For best finish, block your snowflake by pining it out on a towel, inserting a pin in every point and steam gently with an iron, being careful the iron does not touch the fabric.

Chart

 A symbol chart is a visual representation of a crochet pattern. Each round is depicted, stitch by stitch, using symbols that represent the stitches.

Once you get familiar with the symbols that represent each stitch, it is easy to read charts. They are designed to read exactly like they look, so the fabric that you are creating in your hands will look just like the visual diagram on the page.

The important thing to know to work from a crochet symbol chart is where to put the stitches. In this chart you will work round-by-round reading images instead of in words.  This chart is worked from the inside out, starting in the centre and working counterclockwise. The end of round is represented with slip stitch which is the black or pink dot.

Also, round numbers are placed at the start of round and each round is different colour so it is not confusing.

Enjoy

Anna xx

Featured

All about crochet socks

I am a bit late with this post as socktober is over!! Well officially anyway, I think it should be socktober all year round.

Many of you have probably noticed I have been crochet socks obsessed and designed few of them recently.

I also made a little video to accompany this blog, you will find it below. I recorded it last week after my live chat with the lovely Merion from LoveCrafts. We chatted all about socks, how to crochet the perfect fit for your foot and a lot about construction. The video and the blog is a little summarisation of what we talked about for those who missed it and for those who want to crochet a pair of socks.

Lots of people stay away from crochet socks as they are unsure whether they will fit well. Crochet fabric has the tendency to stretch lengthways but not much widthways. Unlike its knitted cousin which has lots of stretch both ways, therefore it is so much easier to fit on your foot. Fear not!! There are ways to make your crochet socks fit comfortably and beautifully on your foot.

First of all, you need to find the right fit for your foot. My sock patters come in three sizes: UK shoe sizes 3/4, 5/6 and 7/8. You can customise the sizes to suite you. For example: I wear shoe size 6 but have a chubby foot, I always make size 7/8 in width, but 5/6 in length. Another example is: if you have a narrow foot and wear shoe size 7, I would make the smallest size in width but the longest in length. Of course, if you are making them as a gift, just stick with the sizing of the lucky person’s shoe size, if you are worried that they will be a bit too small you can always block them aggressively.

Now onto construction

One of my favourite construction of crochet socks is toe-up with an afterthought heel. This is how I learned to crochet socks and for a long time it was my go-to way. They are fantastic! You can try them on as you work and the heel is so fuss free, super easy. My Latchmore and Cupid are toe-up socks. Cupid is brand new design for West Yorkshire Spinners, great starter sock with nice rib texture. The pattern is free on WYS website. Latchmore are beautiful socks with a gorgeous pattern worked in two colours.

Latchmore socks
Cupid socks

However, some might find that the afterthought heel can create a bit of tightness around the heel and top of the foot area. The easiest way to avoid this is to when separating for heel crochet the chains loosely. I also crochet additional stitches on each side of the heel opening when picking up for the heel and decrease every other row to make the heel a bit deeper therefore giving the wearer a bit more room. All those tips are included in my patters for toe-up socks.

The other construction is the cuff down with heel flap, as in my Basic Crochet Socks that I designed for LoveCrafts. This is a fantastic heel construction that is created just as in a knitted sock. The heel flap is worked in rows, then heel turn is created, after that you pick up stitches on either side of the heel flap and finally decrease the gusset. This construction gives you more room around the heel and top of the foot area.

I always include increases in the leg area, usually one. However if you find the leg a bit too tight you can always make the increase sooner or add more, just be careful not to make too many as the sock will not hold up and fall down.

Hope you you try crochet sock and fall in love with them as much as I have. They are so comfortable to wear and quick to make.

If you would like to try simple knitted socks, I’ve designed this pair for LoveCrafts. The pattern is free and you will find it on their website.

Basic knitted socks

Happy sock making,

Anna

Featured

Revamping

The make over of my foot stool is finished!! I’m over the moon how it turned out. I had this image in my head of what I wanted it to be and I have to say it looks way better, (please excuse the ugly before pic, it was taken in the garden just before sanding the legs).

Before
After

I don’t remember how I came about to own this stool, I just remember having it for years. It has a beautiful shape, but it has seen better days. I always said I will give it a makeover and after finding all those little squares in my stash it seemed like the perfect time.

Yes, those perfect little squares. I crocheted them out of tapestry wool, which I got few years ago when John Lewis was discontinuing Anchor, and I was able to purchase them at 10p each! It was an incredible bargain. I originally wrote a blog on making them and included the pattern for the little squares, find the blog here.

All those gorgeous colours and my Brick of course 🙂

My initial idea was to make them into a shawl with grey yarn for the joining and edging, but the truth be told when I was laying it out, the wow factor wasn’t coming. It was just too busy for a shawl for me, I would never wear it, because I was only able to make three squares out of each hank of tapestry wool, achieving a true gradient effect wasn’t really an option. They went into my stash to be forgotten about for a long while, just to be rediscovered when I was sorting it out. I’m determined to finish all the small projects and use up all the yarn in my stash, so I couldn’t let them go back in again. It’s a good job too, as I had almost the perfect amount of them, only few squares left over after creating the cover, it was clearly meant to be.

Ollie was determined to help when I was organising them for a shawl.

I started the revamp with sanding down the legs and taking out the metal leg tips. They were only left on two of the legs and one was broken. I’ll get new leg tips in silver, when I get the chance. The little nails holding the tips in came out easily with pliers. I used coarse sand paper to sand them down, no particular reason, it’s the only one we had at home.

Reading about painting furniture now, they say you have to use primer, paint, then top coat. I did none of that, because I didn’t know. What I used is a little pot of furniture paint that I found in B&Q when Dave and I went there to get some gardening materials. They have it in fab range of colours and it’s perfect for small projects. It’s called Rust-Oleum Painter’s Touch and I’ve chosen the Dark Grey colour.

I gave the legs four coats, and they look fantastic!!

I decided to keep the outer cover, I never reupholstered anything and was too afraid to start now. Also, didn’t see the point in taking it off, it’s undamaged and I didn’t have any suitable furnishing fabric to replace it anyway. The fabric I had the most of in my stash was cotton/linen mix, not very durable, but the stool never was in use much and it will be covered in crochet squares anyway.

Using my trusty staple gun I folded and stapled away. I just couldn’t get the corner nice and tight. Still, it will be covered and I do love the natural colour of the fabric with the grey legs.

Then I started on the squares. After playing with them for ages, I settled for placing them in diamond shape, that way I was still able to create slightly gradient effect. Also, placing them this way ensured that I was able to fold them nicely around corners without any bulk.

I used Flat Slip Stitch method to join them. You can find the tutorial for this technique here.

After pinning the corners, I joined them with Flat Slip Stitch as well.

I used needle and thread to sew each point to the fabric and along the triangle on the sides, just to keep it in place.

Then the final bit was attaching the upholstery nail stud strips which I purchased from BST Fabrics along with nails. Just the legs tips to go and the transformation will be fully complete.

I’m absolutely delighted with how it looks, I love it!! It will have a pride of place in the house now. Well, Ollie has claimed it as his own now, so we can’t even use it 🙂 Even poor Brick doesn’t get a chance to try it out.

Anna xx

Featured

Methods for joining crochet squares

I’m in process of crocheting a blanket, this is the gradient blanket I’ve designed for Sirdar, the pattern number is 10119. I’ve originally designed it in Hayfields Bonus DK, but I decided to use for my version Rowan Felted Tweed DK.

My Felted Tweed version

When the lockdown started, I thought this will be the perfect opportunity to completely organise my home including my huge yarn stash. Well, so far I only did the stash and I was very strict! I went from 6 containers and few additional bags of yarn and project to just 4 containers!! This is really an achievement for me. I donated all that I was getting rid of to the local church who will share it with the elderly ladies, they will use the yarn to knit for charity. I’m sure they will find it useful especially in lockdown.

While sorting out my yarn stash I came across lots of Felted Tweed, not surprisingly really as I love the yarn. That’s how the idea of actually crocheting a blanket for my home came about, I rarely make blankets for our home, they are usually a design for a yarn company. Of course, as much of the tweed as I had I didn’t have enough colours so had to order some more, but hopefully I will use the full balls so won’t be actually adding to my stash. Any small amounts left over I can use to crochet projects.

Anyway, onto joining techniques. All the squares in this blanket are joined using the Join-As-You-Go method which is a fab way joining squares which end in the granny square way. This got me thinking that I could do a blog about my three most favourite ways of joining crochet squares, so here it is. Below you will find descriptions, picture tutorials and video for join-as-you-go, flat slip stitch and slip stitch joint.

Join-As-You-Go

Please note – I start my granny squares at a corner with ch 5 which counts as a 1 tr and ch-2 sp.

This tutorial shows you how to join squares starting from the point when you have to join to the corner (have 3 squares already joined). The method is worked the same way when you start joining at the start, where you will attach only one side.

To start – You must have one square fully made. Then, start the next square and when you come to the final round, crochet 3 sides as normal and you will start joining to the first square on the last side.

Start with one square fully made

Follow the rest of the tutorial and how to finish your round.

1. Work half of next corner (3 tr), insert your hook in corner space of first square (one above), work a slip stitch in that space.

2. Then make 3 tr into the same corner space of the square you are working on (that corner space is now completed).

3. 1 slip stitch into the next space (of the first square) between 2 x 3 tr’s from the first square.

4. Work 3 tr of next space of square you are working on.

Now just proceed. You are making a ‘normal’ granny square, just adding a slip stitch where you join your squares. Super easy. Don’t forget to keep your yarn on the right side of your hook!

When you were joining your second and third squares to corner spaces you were only working slip stitch into it. When you have three squares already joined and you need to attach a fourth one you will work the corner a bit differently, I like working it this way as it gives you a lovely joint.

5. Once you arrive at the second corner (where all four squares meet).

6. From the wrong side of work. Follow the blue lines shown on pic 5, insert hook into corner chain space of the square above and corner chain space of the square to the left, make a slip stitch.

7. Still working on wrong side of work, now follow the green lines in pic 5, insert your hook in corner  chain space of middle square (one on top to the left) and work a slip stitch and 1 chain.

8. Now work 3 tr in corner space of the square you are working on now to finish it off.

Then just finish your square as usual.

9. I start my square with ch 5 and 3 tr in same chain space. To finish the joint, I work 2 tr in the beginning chain space, then join it to the 3rd of beginning 5 ch.

10. Then slip stitch to the chain space of square you are working on and corner chain space of square you are joining to.

Flat slip stitch

I have used this method to join squares in the Bolderwood blanket. It produces gorgeous flat joint that is very eye catching. I’ve used the same colour to join the squares as for edging and it just ties in everything beautifully. The joint has no bulky seam just a clearly defined vertical and horizontal lines of stitches on the right side of work.

Place the squares side by side with RS facing up. Join yarn and squares with sl st in corner spaces. You will work only into the back loops of stitches.

Position your yarn so it’s in front of your hook, you will be moving your hook above the working yarn.

11: starting with the square to your right, insert hook from front to back into the back loop of the stitch, pull the loop through the one on hook.

12: Insert hook into back loop of next st on the left, followed by back loop of next st to the right, moving the hook above the working yarn.

13: Yarn around hook and pull through all three loops on hook. 

14: You might find it useful to hold the squares with wrong sides facing each other.

15: Continue repeating steps 11 to 13 until all the squares are joined.

16: When working over corners, join a corner of square you are working on with sl st to corner on the opposite side, so that the stitches cross over.

17: This will give you a nice finish.

Slip Stitch joint

This is a fab and super easy joint. I’ve used it in my Cushion CAL and Lisbon Tiles blanket.

Please note – in the video I start by joining two squares at the same time to corners. Both way are fine to do, they really don’t make any difference.

18: Join yarn to any corner chain space of your first square.

19: Insert hook into any corner chain space of next square.

20: Make a slip stitch to join two squares.

21:  With wrong sides facing each other, hold the squares together and with yarn at the back, insert the hook under full stitches (both legs of the V) of both squares.

22: Make a slip stitch.

23: Continue repeating steps 21 and 22 until the whole row of squares is joined. When you come to corner ch-sp treat them as a stitch but insert the hook into the spaces.

Below is a video with all three techniques. Hopefully you will find it useful.

Here’s a breakdown of what technique is at what point in the video:

  1. Join-As-You-Go – beginning to 9.58 min
  2. Flat slip stitch joint – 10 min to 14.05 min
  3. Slip stitch joint – 14.07 min to end

Enjoy,

Anna xx

Featured

My new book

I have realised that I have never written a blog about my new book, Crocheted Wreaths for the Home’. After months and months of secret making and planning it is wonderful for the book to be finally out. I thought it would be good to share few bits about the book with everyone who does not do the social media thing and images and my general happiness about it.

It’s always strange to release a new book into the wild, I’m always worried about how it will be received, but I worried for nothing, I have been over the moon with the receptions, so thank you so much everyone.

My beautiful friend Jade of @bb.creates.joy created the sweetest stitch markers to celebrate the release of the book. They are so sweet and available from my website, there’s a pumpkin, beetroot and acorn. I adore them so much Jade has done an amazing job with polyamide clay, she’s very talented.

The book came out in March and I had lots of very exciting things planned. Book launch at The Yarn Dispensary, lots of classes in other shops, but because of the outbreak of Corona Virus everything had to be postponed until further notice. It was disappointing after so many months of planning, but necessary and I am really looking forward to getting out and crocheting with everyone when it is safe to do so.

The book is all about wreaths, hence the name haha…The idea for it came when I took part in Kirstie’s Handmade Christmas in 2017 (I know, that long ago!). I was a contestant in the wreath making competition where I made a crochet wreath. Search Press though that crochet wreaths would be a perfect project, I had to agree, I mean who doesn’t love a decorative wreath?

I’m a big fan of hanging ornaments and wreaths are just perfect, I never believed that wreaths are just seasonal and I have one hanging somewhere in my house all year around. In this book I wanted to create a mixture of wreaths to celebrate events throughout the year such as Christmas, Easter and Halloween, also seasons, but it was also very important to me to have wreaths that can be displayed all year around such as the Mini Wreaths or the Berry Wreath. When I created the latter wreath, I hanged it on my wall in the bedroom for few weeks just to see if I like it. Even though the wreath looks rather simple, it is fact very effective, a very unassuming statement maker.


The book contains 12 wreath designs and each wreath is accompanied by a smaller project that incorporates the main design in some form or other such as bunting, brooch and many others. When designing each wreath I wanted to create projects that not only can be made into a wreath but so the maker can use to create other decorations and accessories.

I created this little mice heist by using the mouse pattern from mini wreath and the berries and ivy leaves from the berry. The two mice are the same ones just on one of them I positioned the ears differently, so it looks like it’s looking down. I’ve changed the hook size and used thinner yarn. I used Jamesion’s of Shetland Spindrift and 2.50mm hook for the mice and small berries and leaves and yarn held double and 4mm hook for the bigger berries, leaves and vine. It’s just to show that you can take elements from each wreath and create other amazing decorations. I’m making a vegetable bunting now.

I have also been creating smaller wreaths with the flowers from The Easter wreath.  I have done few Instagram takeovers and shared a pattern from the book for each takeover, they have been deleted now, but the video on how to make a wreath base from ivy vines, it is still available on Search Press Instagram.

Easter wreath

I’ll also be releasing three blogs to cover few techniques for crochet and finishing that are important for the project in the book, so please watch this space.

If you want to hear about future takeovers and new blog, please follow me on Instagram or Facebook and please follow the blog to be the first one to hear.

Thank you so much for all the love to my book, it really means the world.

The book is available from lots of independent craft and book shops and other retailers:

Search Press

The Yarn Dispensary

Tribe Yarns

Just Knots

The Orry Mill

John Lewis

Stay save and happy crocheting,

Anna xx

Featured

Hyacinth bulb

Around two weeks ago the lovely people at Search Press interviewed me for their blog and also asked me if I had any projects that didn’t make it into my book, Crocheted Wreaths for the Home. There were few but these hyacinth bulbs were my favourite and I had to share them. You can read the interview here.

Nothing symbolises Spring to me like hyacinth bulbs, and they are at the most beautiful when the flowers are just coming out, so of course I had to add flowers to my bulbs. I had this bright idea on Saturday while looking at the bulbs displayed in our bedroom, I adored them, but they needed colour.

I made flowers, followed by crochet I-cord stem and then put it all together and then I was happy.

The pattern for the bulb was only available on the Search Press blog but I decided to gather all the patterns and video here so you can have it all in one place.

The video shows you how to make crochet I-cord stem, insert wire into it and fit it inside the top of bulb. Of course if you are making the bulb from scratch insert the stem at the same time as leaves but I had the bulbs already made and wasn’t going to unpick the leaves.

Materials

Oddments of DK yarn in four colours.

I have used Rowan Felted Tweed DK in Phantom 153, Avocado 161, Frozen 185 and Clay 177.

Brown (A), green (B), pink (C) and few strands of Cream (C)

3 mm crochet hook

2.50 mm crochet hook

Small amount of toy stuffing

Tapestry needle

Lockable stitch marker

Approx. 30 cm length of thin craft wire

Glue (optional)

Finished size

The completed bulb with leaves measures approx. 12 cm in height and 16 cm around the fattest part.

Tension

6 dc and 7 rnd to 2.50 cm square over dc using 3 mm crochet hook.

Abbreviations

[] – work instructions within brackets as many times as directed

* – repeat instructions following the single asterisk as directed

approx.  – approximately

Ch – chain

Ch-sp – chain space

Dc (US sc) – double crochet

Dc2tog (US sc2tog) – double crochet two together – [Insert hook into next stitch (or as required), yrh and pull loop through] twice, (3 loops left on hook), yrh and pull loop through all 3 loops on hook.

Htr (US hdc) – half treble

Miss (US skip) – omit st(es)

Rep – repeat

Rnd(s) – round(s)

Sl st – slip stitch

St(s) – stitch(es)

Yrh – yarn around hook

Pattern notes

  1. Bulb is worked in a continuous spiral.
  2. Pattern is written using UK terminology with US conversions given in brackets in abbreviation list.

Bulb

Using 3.00 mm hook and yarn A work 6 dc in an adjustable ring, enclosing the yarn end as you work, pull tight on the yarn end to close up opening.

Place marker on the first st to denote the beginning of rnd, move the marker up as you work.

Rnd 1: 2 dc in each st to end (12 sts).

Rnd 2: *2 dc in next st, 1 dc in next st, rep from * to end (18 sts).

Rnd 3: *2 dc in next st, 1 dc in next 2 sts, rep from * to end (24 sts).

Rnd 4: *2 dc in next st, 1 dc in next 3 sts, rep from * to end (30 sts).

Rnd 5: *2 dc in next st, 1 dc in next 4 sts, rep from * to end (36 sts).

Rnds 6-9: 1 dc in each st to end.

Rnd 10: *dc2tog, 1 dc in next 4 sts, rep from * to end (30 sts).

Rnds 11-12: 1 dc in each st to end.

Rnd 13: *dc2tog, 1 dc in next 3 sts, rep from * to end (24 sts).

Rnd 14: 1 dc in each st to end.

Start stuffing the bulb now, do not over stuff, but make sure the shape is nicely rounded and the bottom flat.

Rnd 15: *dc2tog, 1 dc in next 2 sts, rep from * to end (18 sts).

Rnd 16: 1 dc in each st to end.

Rnd 17: *dc2tog, 1 dc in next st, rep from * to end (12 sts).

Stuff the bulb a little more.

Rnd 18: sl st in st with marker, you can remove the marker now, [ch 3, 1 dc in second ch from hook, 1 htr in next ch, miss st with sl st and next st, sl st in next st] 6 times, ending last repeat with sl st to first sl st. (6 points)

Fasten off leaving a tail of around 10 cm.

Leaves (make 3)

Using 3.00 mm hook and yarn B make 15 ch.

Rnd 1: 1 dc in second ch from hook , 1 dc in next 3 ch, 1 htr in next 9 ch, 4 htr in next ch, working on the other side of foundation ch, 1 htr in next 9 ch, 1 dc in next 4 ch, ch 3, sl st to first dc. (30 sts)

Fasten off.

Flowers (make 11)

Using 2.50 mm hook and yarn C.
Rnd 1: Into adjustable ring work, ch 1, [1 dc, ch 3] 5 times, enclosing the tail as you work, at the end pull on the tail to close up opening,  sl st to first dc. (5 petals)

Fasten off.

Stem

Using 2.50 mm hook and yarn B, leave around 15 cm tail before you start, make 3 st crochet I-cord 6 cm in length.

Watch the video below to show you exactly how to do this, or follow the written instructions to make the I-cord.

Fold wire in half and insert inside the stem, then insert the stem between the leaves on top, using the beginning tail sew in place to leaves.

Making crochet I-cord

You will also need one double pointed needle or short knitting needle or long sewing up needle

Step 1: Ch 3, insert hook into second ch from hook, yrh and pull up a loop, insert hook into next ch, yrh and pull up a loop. (3 loops on hook).

Step 2: Slip first 2 loops onto double pointed needle or whichever needle you have handy. Yrh and pull through remaining loop on hook. Insert hook into first loop on needle, yrh and pull yarn through (2 loops now on hook). Insert hook into second loop on needle, yrh and pull yarn through (3 loops now on hook).

Repeat step 2 until i-cord measures desired length. Cut yarn, leaving a tail of around 10 cm. Yrh and pull end through all 3 loops on hook, pull tight to fasten off.

Making up

Weave in all ends.

Block leaves by pinning out and steaming gently with an iron. Inserting pin under ch 3 sp to create a nice point.

Using photograph as a guide – Insert three leaves with ch-3 sp facing up into the bulb opening on top, followed by stem, using the bulb yarn tail sew to secure in place. 

Attached 11 flowers around crochet I-cord stem. I’ve used glue gun to do this, but you can sew them in place or use a craft glue.

Roots

Cut 6 lengths of C, approx. 10 cm long, using crochet hook feed the yarn around dc from adjustable ring rnd, fold the yarn in half and tie in a knot.

Your hyacinth bulb is finished 🙂

Enjoy,

Anna xx

Featured

Mosaic Crochet – tutorial

Some of you would have already seen the beautiful ‘Clean Lines’ shawl I designed for Inside Crochet magazine, this month’s issue 124.

I have been obsessed with mosaic crochet lately and just had to design a shawl in it. For yarn, I’ve chosen Manos del Uruguay Marina, it’s a gorgeous lace weight single-spun yarn, made from superwash merino wool. Every skein is hand dyed goodness, I went for the semi solids in Luna and Atlantis, but I do want to make this shawl again and I’m thinking of semi solid and speckled.

Mosaic crochet is an amazing technique that might look very complicated, but in fact it’s very easy to achieve. In this tutorial I want to walk you through the basics of it while making a small swatch, so you can all crochet the Clean Lines shawl and fall in love with mosaic.

The tutorial includes pictures and video just showing you the technique.

Mosaic crochet has been around for a long time, I remember coming across it in my friend’s vintage crochet magazine. It has seen a resurge in popularity recently and no wonder, the finished effect of mosaic crochet is stunning, and it is rather simple to achieve. It might take a while to get the hang of it, but once you get going there will be no stopping you.

Mosaic Crochet is very similar to Mosaic Knitting, it follows the same chart, you work with one colour at a time, and both techniques give you the opportunity to create beautiful colourwork patterns without changing yarn in one row or round. In Mosaic Crochet you can simply connect rows or rounds by skipping a stitch and “filling” the skipped stitch with a treble 2 rows or rounds later with the alternate coloured yarn.

I found the best mosaic charts are by Barbara Walker, who has a whole collection of charted patterns.  You can also create your own of course.  And without doubt, knowing how to work off a visual chart is much, much easier than working off rows and rows of text.

Working from chart 

  1. The chart is read from right to left on the RS and from left to right on WS.
  2. Each row is worked twice.
  3. The beginning square on each row represents the starting colour of that row.

It is usually not shown on the chart; we always start off with foundation row of dc, I like to use the chainless foundation as it produces nice row of readymade dc (you can find tutorial by Bella Coco on it here). If you are starting with ch, work one row of dc.

Ideally, foundation row should be in the opposite colour as the first row.

Choose which you would like to be the background colour (black squares) and motif colour (white squares)

In my case: colour A is dark green and colour B is cream

Abbreviations:
Ch – chain
Dc – double crochet (US sc)
Tr – treble (US dc)
Sq – square
RS – right side
WS – wrong side

Note – do not cut yarn after every two rows, carry it with you on the edge of work. Change colour on the last row at the last stage of dc, when you have two loops on hook, finish off the dc in new colour.

Reading Directions

Row 1 & all odd rows (RS) – read from right to left

Row 2 & all even rows (WS) – read from left to right

Each row represents 2 rows (worked in one colour) (Rows 1&2; Rows 3&4; Rows 5&6; etc.)

Reading the rows

Starting at the bottom-right of the chart.

Black row (Rows 1&2):

Row 1: Whenever you see a black square, you dc.

When you see a white square, you ch and miss the next st.

Note: When chaining (to prevent puckering) – 1 sq = 2 ch, 2 sq = 3 ch, 3 sq = 4 ch, etc.

Row 2: Then on the next (even) row (still in black), you do exactly the same.  You dc every black stitch and chain (the same number of chains) as per previous row.

White row (Rows 3 & 4):

Row 3: On the chart, whenever you see a white square over black [White/Black], you dc.

When you see a white sq over a white sq [White/White] (it will actually be over black chains on your work)  you drop tr down 2 rows (into the row of the same colour as the working yarn) and IN FRONT OF the chains below.

Row 4: Then on the next (even) row (still in white), you do exactly the same, but in dc and chains.  You dc every white stitch and chain (the same number of chains) as per previous row.

Rows 5 & 6: Dc on black sq, ch on white sq and tr over Black/Black sq.

Continue working in this way until full chart is completed.

When you want to finish your work on your last row work dc and tr in st do not ch and miss any.

Here’s a video to show you the technique. This is the first tutorial video I made where I’m speaking, I was very nervous, not sure why, but it caused my stutter to be a bit more prominent.

Hope you enjoy the technique and have a go, it is very addictive.

Anna xx

Featured

Sparrow shawl

Hope you are all staying safe and taking care of yourselves and if self-isolating you have plenty to keep you entertained. It is a very frightening time but let’s remember that we are all in the same boat, and we must help, whenever we can, the less fortunate.

There are great websites where you can register to volunteer in your local community: https://covidmutualaid.org/resources/

You can donate food to your local food bank: https://www.trusselltrust.org/get-involved/ways-to-give/donate-food/

or if you cannot donate food, you can donate money: https://www.trusselltrust.org/get-involved/ways-to-give/donate-food/

Above all please take care of yourselves, if you are worried and need help please visit this website: https://www.gov.uk/guidance/coronavirus-covid-19-information-for-individuals-and-businesses-in-wales

or

https://111.nhs.uk/covid-19

This shawl might be the perfect project when you are self-isolating, I’m hoping it will keep your mind off the horrible things happening. It is a deep triangular shawl worked top down in traditional granny square style. It’s a stash buster shawl which is super quick and easy make. I came up with the idea for it from simply looking at my yarn stash. All the one balls of yarn that we save here and there will be perfect to use for this shawl, I’m about to start a second version using all the oddments. All you need is enough in your oddments of one colour to complete one row. I have used DK yarns but any weight will be great, just adjust the hook size accordingly, I would go 2 sizes up from what’s recommended for your yarn.

The shawl gets its name from the lovely sparrows that were flying around when we were taking pictures of the shawl at Rye Meads in Hertfordshire.

This version is done with Drops Puna and Louisa Harding Amitola. I don’t even remember what I bought the Drops yarn for exactly, but it is the most beautiful shade of grey. The colour in Amitola is long discontinued and I remember I bought it on sale in John Lewis ages ago. I love Amitola yarns and colours, it has long lengths between colour changes which looks lovely when crochet. I only had one ball of this yarn so decided to spread it out across the shawl.

I have used exactly 5.5 balls of the Drops yarn and almost everything of Amitola, I just had a tiny bit left.

Before you get crocheting, please read these first:

•             Please note that pattern is written using UK terminology with US conversion given in abbreviation list.

•             Do not cut yarns after every stripe but carry it with you – see techniques at the end of pattern.

Materials

Colour A – 6 x Drops Puna sh.07 – 100% Alpaca, 110 m (120 yds) to 50 g

Colour B – 1 x Louisa Harding Amitola DK sh.103 – 80% Wool, 20 % Silk, 250 m (273 yds) to 50 g

5 mm (US 8/H) crochet hook

Tapestry needle

Tension

After gentle blocking 5 tr groups and 11 rows measured over pattern to 10 cm (4 in) using 5 mm hook.

Finished size

The measurements are taken after gentle blocking – approx. 180 cm at the top edge and 88 cm deep.

Abbreviations

[] – work instructions within brackets as many times as directed

*and ** – repeat instructions following the single or double asterisk as directed

Adjustable ring – for a picture tutorial on how to make adjustable ring please visit the tutorial page on my website: https://moochka.co.uk/pages/tutorials

Approx – approximately

Beg – beginning

Ch – chain

Ch-sp – chain space

Dc (US sc) – double crochet (US single crochet)

Tr (US dc) – treble (US double crochet)

Tr group – 3 trebles

Rep – repeat

Rnd(s) – round(s)

RS – right side

St(s) – stitch(es)

Yrh – yarn around hook

Foundation row: Using colour A, work ch 1, 1 dc, [ch 3, 1 dc] 3 times into an adjustable ring, enclosing the yarn end as you work, pull tight on the yarn end to close up opening. (3 ch-3 sp)

Row 1 (RS): ch 4 (counts as 1 tr and ch-1 sp here and throughout), 3 tr in first ch-3 sp, [3 tr, ch 4, 3 tr] all in next ch-3 sp, 3 tr in next ch-3 sp, ch 1, 1 tr in last st. ( 4 x tr groups)

You may wish to place a marker at the centre ch-4 sp to denote the spine of the shawl, move the marker up as you work.

Change to colour B

Row 2: ch 1 (does not count as a st here and throughout), 1 dc in first st, ch 3, 1 dc in next ch-1 sp, ch 3, 1 dc between next tr groups, ch 3, [1 dc, ch 4, 1 dc] in centre ch-4 sp, ch 3, 1 dc between next tr groups, ch 3, 1 dc in last ch-1 sp, ch 3, 1 dc in 3rd of beg ch 4. (7 ch-sp)

Row 3: ch 4, 3 tr in every ch-3 sp to centre ch-4 sp, [3 tr, ch 4, 3 tr] all in centre ch-4 sp, 3 tr in every ch-3 sp to last st, ch 1, 1 tr in last st. ( 8 x tr groups)

Change to colour A

Row 4: ch 1, 1 dc in first st, ch 3, 1 dc in next ch-1 sp, ch 3, *1 dc between next tr groups, ch 3* rep from * to * to centre ch-4 sp, [1 dc, ch 4, 1 dc] in centre ch-4 sp, ch 3, rep from * to * to last ch-1 sp, 1 dc in last ch-1 sp, ch 3, 1 dc in 3rd of beg ch 4. (11 ch-sp)

Rows 3 and 4 form the pattern.

Keep repeating the pattern working in colour sequence as set below.

Do not cut yarns after every colour change but carry it with you neatly up the side of work catching it in stitches (see instructions below).

Colour sequence

Row 5 – A

Rows 6 and 7 – B

Rows 8 and 9 – A

Rows 10 and 11 – B

Rows 12 and 13 – A

Rows 14 and 15 – B

Rows 16 and 17 – A

Rows 18 and 19 – B

Rows 20 and 21 – A

Rows 22 and 23 – B

Rows 24 and 25 – A

Rows 26 and 27 – B

Rows 28 to 31 – A

Rows 32 to 33 – B

Rows 34 to 39 – A

Rows 40 and 41 – B

Rows 42 to 49 – A

Rows 50 and 51 – B

Rows 52 to 61 – A

Row 62 – B

Row 63 – A

Row 64 – B

Continue in colour B

Row 65 (RS): ch 4 (counts as 1 dc and ch-3 sp), *1 dc in next ch-3 sp, ch 3*, rep from * to * to centre ch-4 sp, [1 dc, ch 4, 1 dc] in centre ch-4 sp, ch 3, rep from * to * to last st, 1 dc in last st. (133 ch-sp)

Carrying yarns

To avoid frustrations and huge amount of ends to weave in carry the yarn with you up the side of the shawl and do not cut it at every colour change.

For the neatest finish, change on the last stitch of treble row.

1: Stop on the last stage before treble is completed, when you have two loops on hook.

2: Drop the working yarn to the back of work and pick up new colour from the front of work.

3: Finish off the stitch with new colour.

Continue this way when you have two rows between colour changes.

When you need to carry yarn over few rows, catch it twice at the beginning and end of tr: yrh, insert hook in next st, place the yarn you need to carry on the hook, yrh, pull up a loop, making sure that the additional yarn doesn’t come through the stitch but is stays neatly on top of the working yarn, yrh pull through two loops on hook, place the yarn you are carrying on the hook again, yrh, pull though two loops on hook, the additional yarn stays on top of working yarn neatly moving up the sides.

Stop carrying yarns after row 41, the changes between colours just get too wide.

Stay safe and happy crocheting,

Anna x

Featured

Cushion Crochet Along

I’m so delighted to shout about my first Cushion CAL!!

I have never run a Crochet Along so it’s all very new and exciting. I can assure you it will be fun and I even have prizes at the end!!

Let me first tell you everything about it and how to take part.

Timetable:

The CAL will start on Saturday 5th October and run over 8 weeks.

There are three types of squares in the CAL. A new square will be released every 2 weeks:

5th October – Square 1 – Colourwork

19th October – Square 2 – Popcorn

2nd November – Square 3 – Cable

16th November – Making up and finishing

30th November – Prize draw

Patterns:

The patterns are free and include written instructions, charts and picture tutorials where necessary, I have also created few videos. All the photos will be included in the pattern on the last pages so no need to print them out. There will be links to video whichever are applicable to a pattern.

Please note – Patterns are written using UK terminology with US conversions given in brackets in abbreviation list.

Yarn:

The yarn I have used is West Yorkshire Spinners Colour Lab DK – you can see the shades here – https://www.deramores.com/products/west-yorkshire-spinners-colourlab-dk?variant=21474764718162

The lovely people at Deramores have also created yarn packs with the colours I have used. They yarn is at 10% off at the moment so perfect time to get it. For individual colours see link above. You can find the yarn packs here –  https://www.deramores.com/products/cushion-cal-colour-pack-by-anna-nikipirowicz-in-west-yorkshire-spinners-colourlab

Any DK will be fine, you will use around 150m of each colour.

You will need 3 colours 1 ball of each, if you would like to have squares on both side of cushion instead of fabric you will need 6 balls or approx 300 m of each colour.

Finished size:

Completed cushion measures 50 x 50 cm, however, that is if tension is obtained.  If you would like a smaller or bigger cushion adjust your hook size or yarn thickness.

Hook and additional materials:

4.50mm (US 7) or size needed to obtain tension.

I recommend waiting until all the squares are joined before getting all the additional materials below.

The cushion is lined and backed with fabric. The reason I have backed the cushion is because the popcorn squares have quite big spaces in the corners and I love how the colour of the fabric peeps through. Wait before getting the fabric until the squares are joined, so you can measure it properly and get the right amount.

For my cushions I have used 55 x 55 cm of fabric, that has allowed me 2.50 cm on each side for seam allowance.

If you don’t want to make your own cushion cover, just sew the joined squares onto already made cushion cover.   

41 cm zip or size needed for your cushion cover. Get zip few cm shorter than your cushion cover so it has few cm of space on either side.

55 x 55 cm cushion pad – again, get the cushion pad after you have the exact measurements of finished cover. I get 5 cm large pad as I like the cushion to be nice and plump.

Taking part:

The pattern will be available from 9am BGT

If you sign up to my newsletter the pattern will be emailed a day earlier. You will also get a code for 10% off, I have a 20% promotion on my website as well right now, until 6th October.

To sign up to the newsletter, go to my website – https://moochka.co.uk/

The patterns will be available through:

My website – https://moochka.co.uk/

Ravelry – https://www.ravelry.com/patterns/library/cushion-cal

I have also opened a Ravley group, If you like, please join here – https://www.ravelry.com/groups/anna-nikipirowicz

The group will be a wonderful place to share your progress, chat and ask any questions.

If you prefer you can also share your progress in the comments in this blog,

Or just use my email to ask any questions or show your finished cushion cover on info@moochka.co.uk

To enter the prize draw please post pictures of your finished cushion on the Ravelry group, in comments on this blog or email them to me.

I have talked a bit about the cushion in my podcast, which I host with my friend Annette – Two Peas in a Woolly Pod: https://www.youtube.com/watch?v=0x9ZUYtWAlw&t=174s

Hope you all can take part and I can’t wait to see your squares 🙂

Brick is ready 🙂

Anna x